• Required reading for all forum users!!!

    Welcome!
    Register to access the full functionality of the GSResources forum. Until you register and activate your account you will not have full forum access, nor will you be able to post or reply to messages.

    A note to new registrants...
    All new forum registrations must be activated via email before you have full access to the forum.

    A Special Note about Email accounts!
    DO NOT SIGN UP USING hotmail, outlook, gmx, sbcglobal, att, bellsouth or email.com. They delete our forum signup emails.

    A note to old forum members...
    I receive numerous requests from people who can no longer log in because their accounts were deleted. As mentioned in the forum FAQ, user accounts are deleted if you haven't logged in for the past 6 months. If you can't log in, then create a new forum account. If you don't get an error message, then check your email account for an activation message. If you get a message stating that the email address is already in use, then your account still exists so follow the instructions in the forum FAQ for resetting your password.

    Have you forgotten your password or have a new email address? Then read the forum FAQ for details on how to reset it.

    Any email requests for "can't log in anymore" problems or "lost my password" problems will be deleted. Read the forum FAQ and follow the instructions there - that's what we have one for...

  • Returning Visitors

    If you are a returning visitor who never received your confirmation email, then odds are your email provider is blockinig emails from our server. The only thing that can be done to get around this is you will have to try creating another forum account using an email address from another domain.

    If you are a returning visitor to the forum and can't log in using your old forum name and password but used to be able to then chances are your account is deleted. Purges of the databases are done regularly. You will have to create a new forum account and you should be all set.

GS 1000 engine in GSXR 1100 first gen frame?

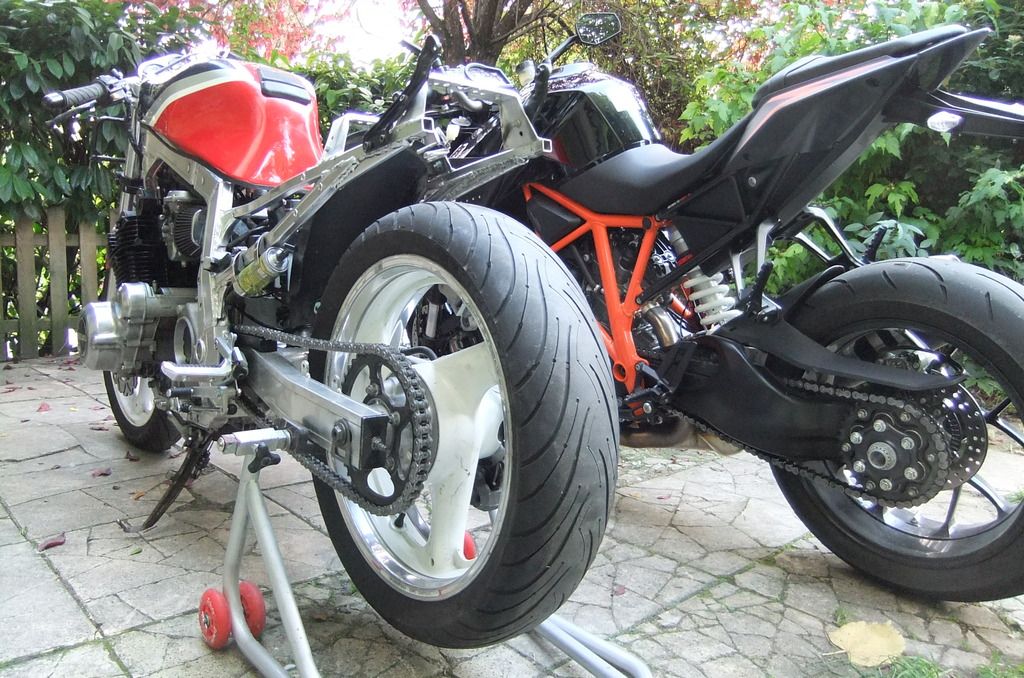
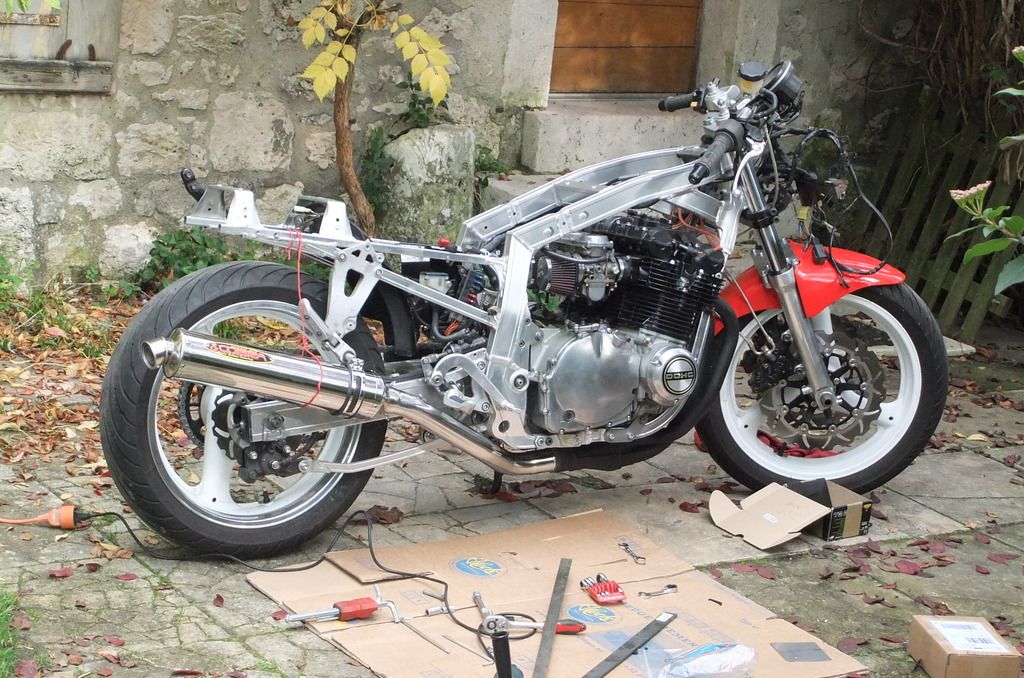
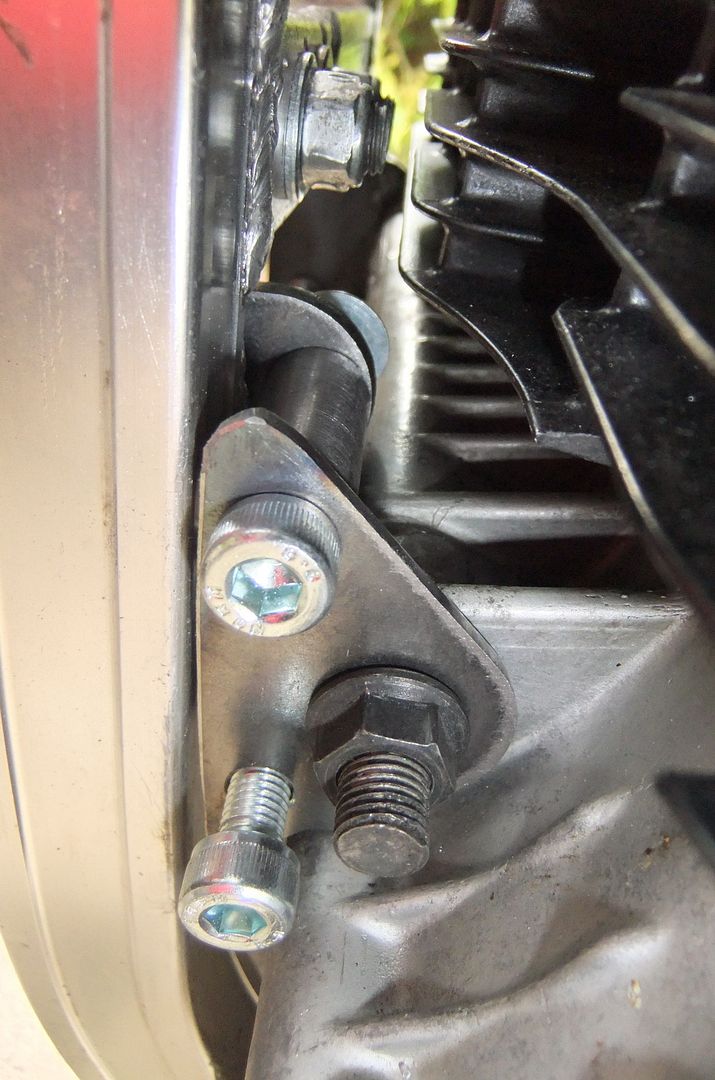
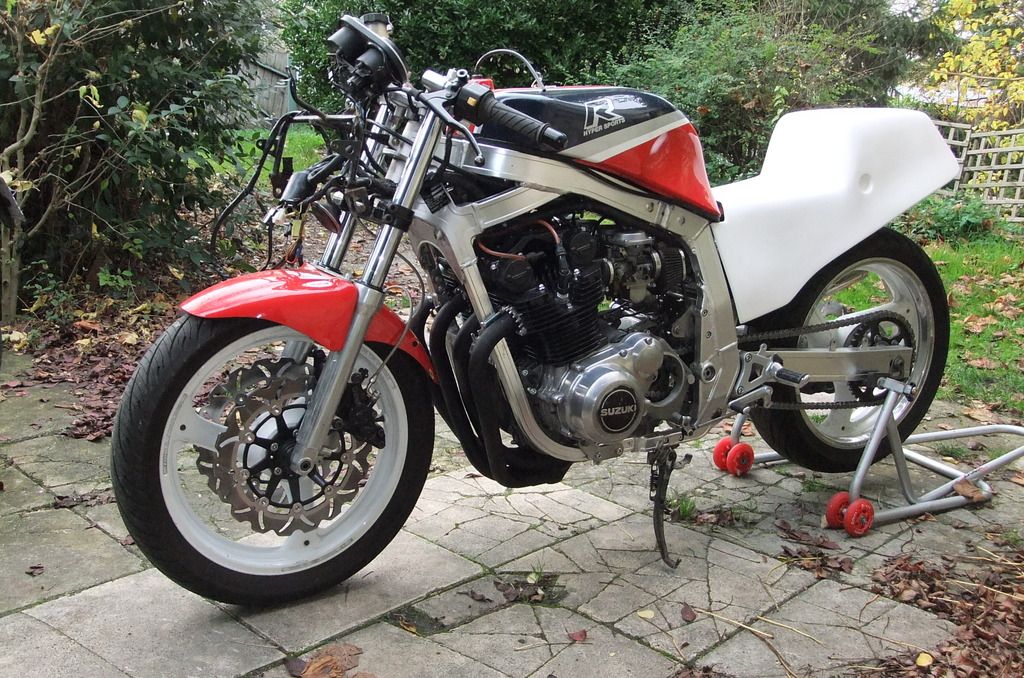
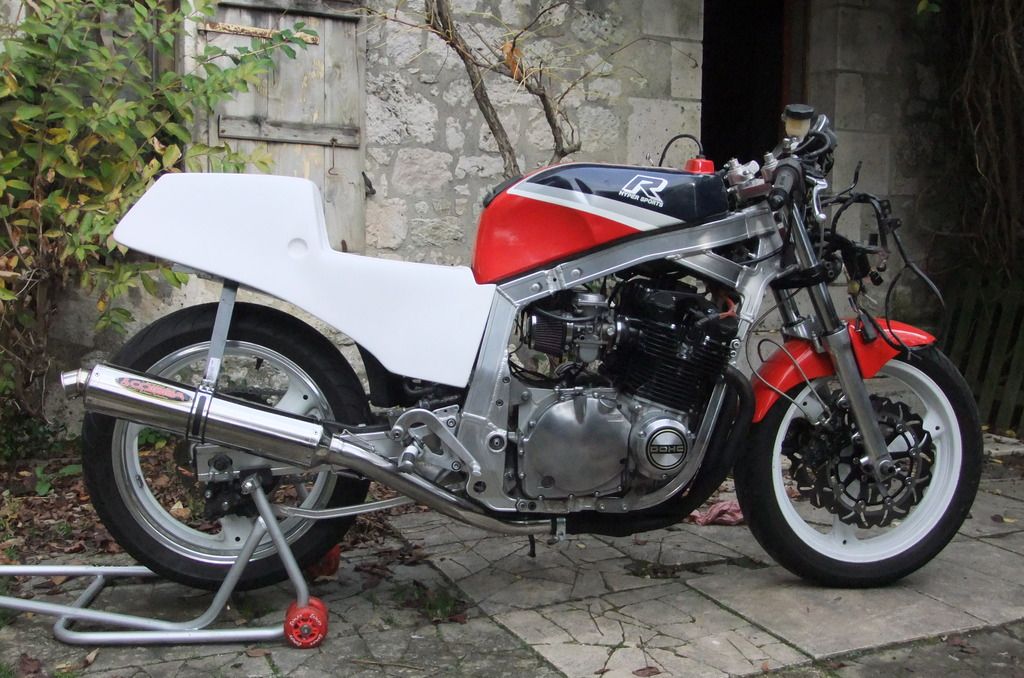
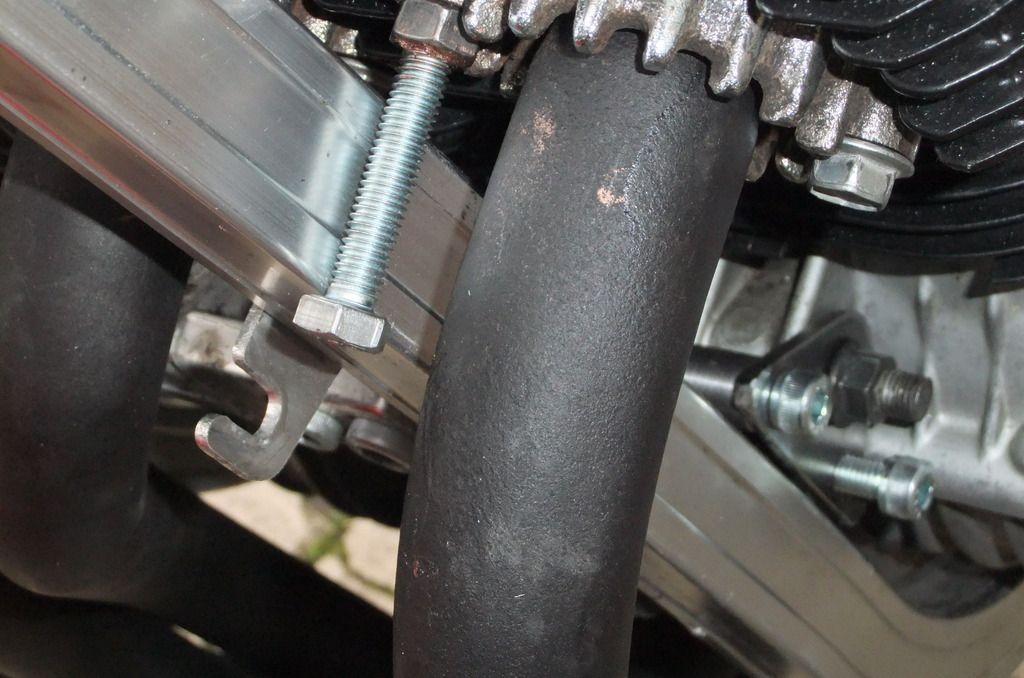
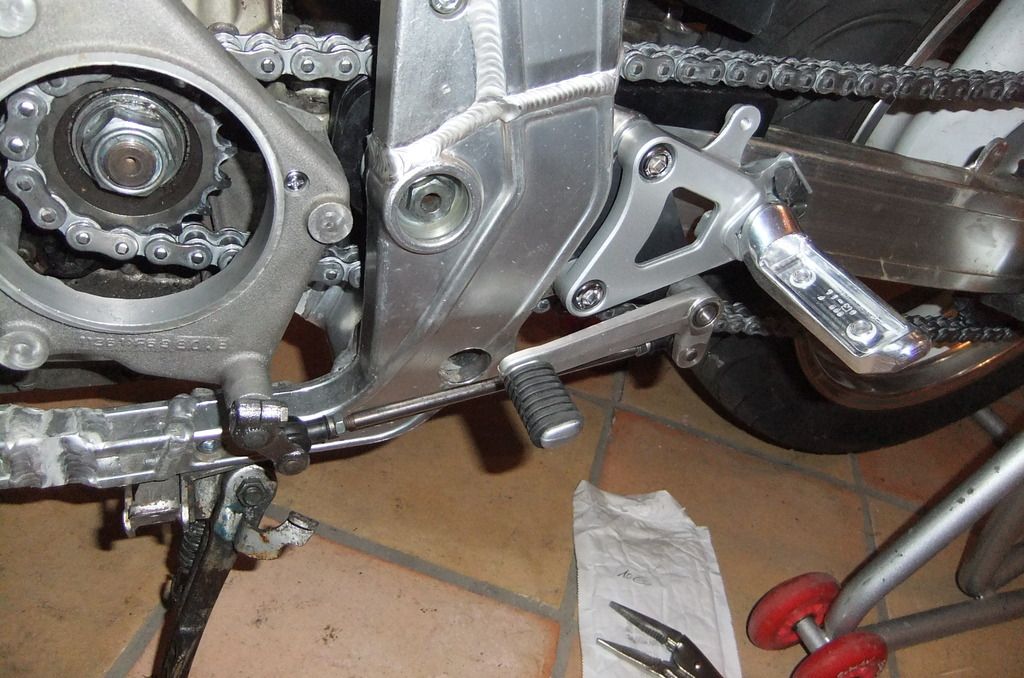
A small step forward today: the shift lever is now in place.
The shift lever comes from the 2nd generation 1100 Katana ( I borrowed it from my own bike) and the rod is the OEM rod that comes with the GSXR 1100 86-88.

DSCF6604_zpsuxodssqf.jpg


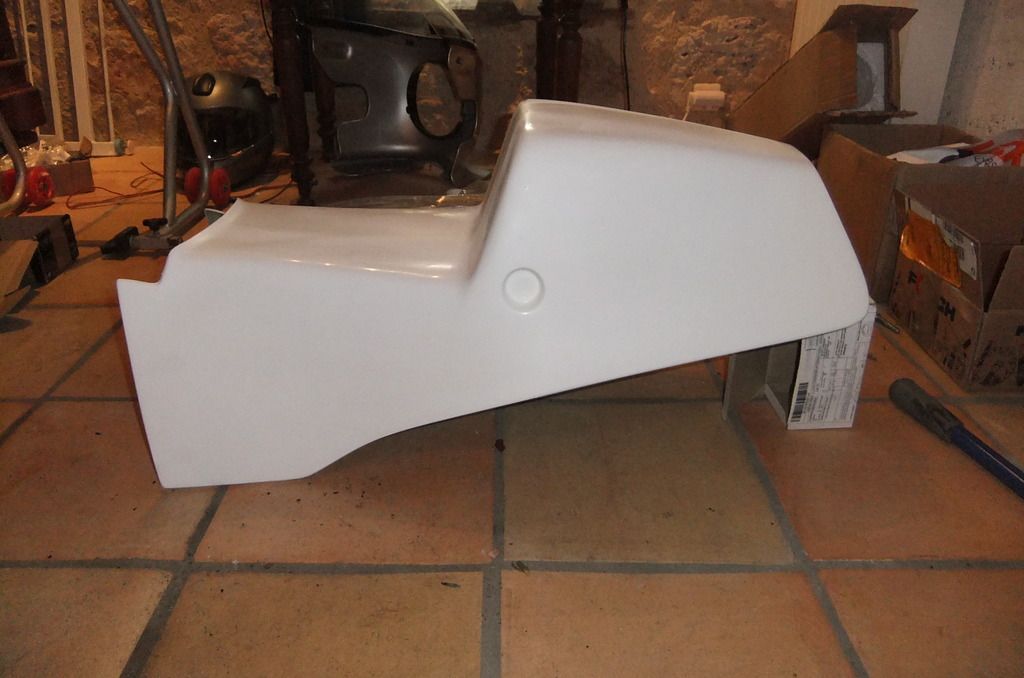
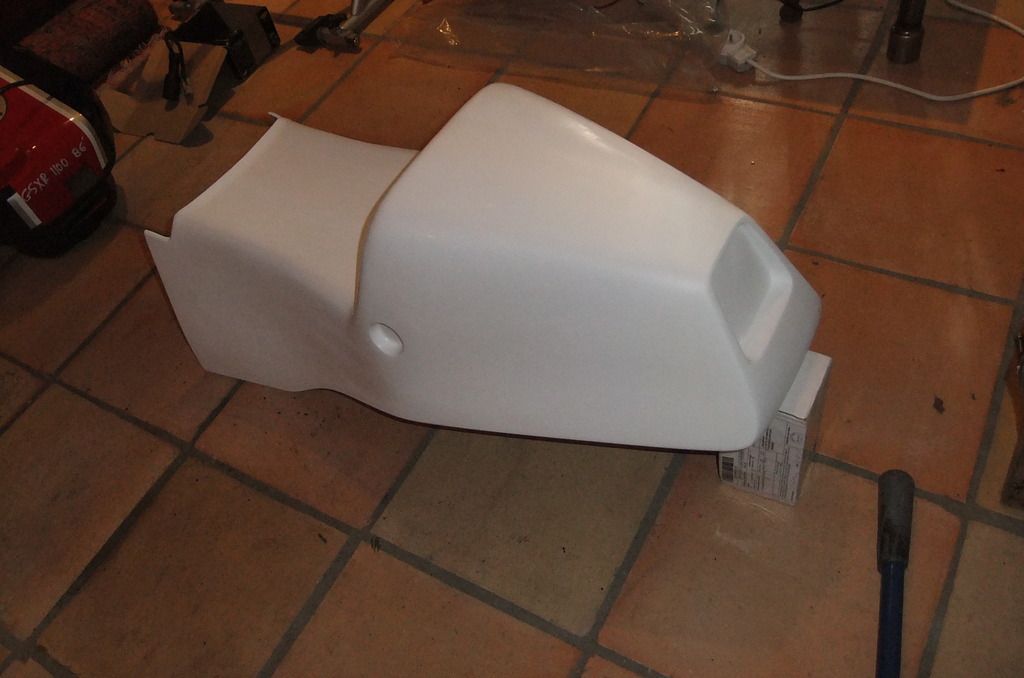
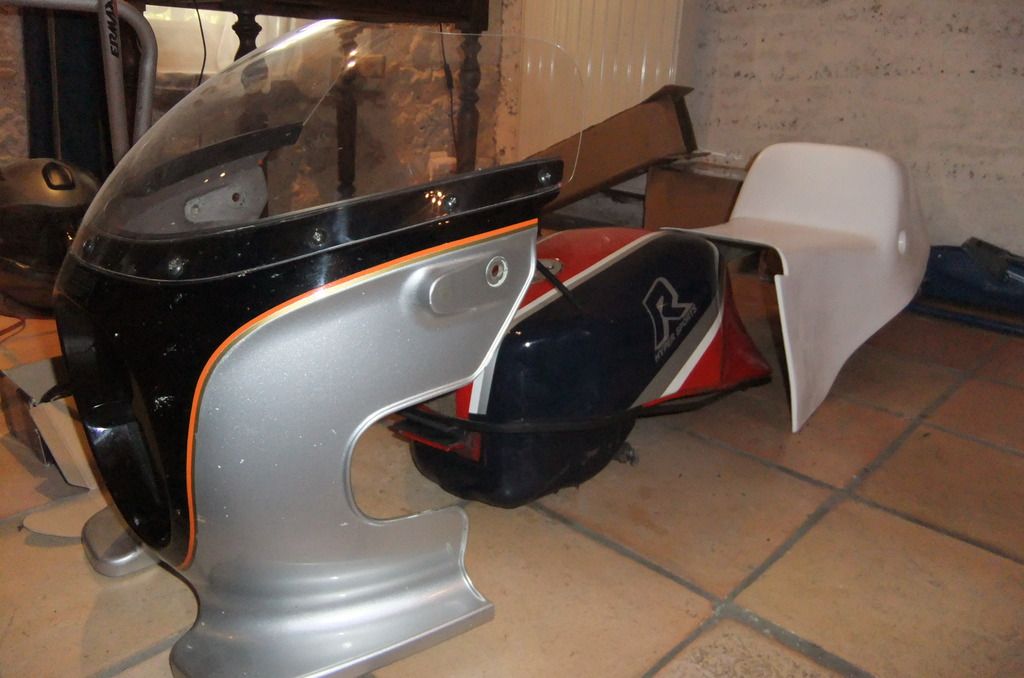
On the fairing side, the Yoshimura endurance model is no longer available...
On the other hand as I want to keep the handlebars above the top triple, the solution could be to use the GSXR 1100 W 93-98 upper fairing.
There is a fiberglass copy that comes with round lights that looks good to me: it's PN 489
Definitely more modern than the bathtub models...

http://www.poly26.com/carenage-moto-tuning-suzuki-1100-gsxr-1993-1998-w_4-103.html
 
Some good news and a small setback today.
The issue came from the front left engine bracket that was composed of three parts welded together.
While it fitted perfectly when not assembled, it proved impossible to insert the bracket between the engine and the frame due to it Z shape...
Back to the drawing board but at least I know how to correct the issue.
The OEM GSXR 1100 G/H throttle cable is now also in place.
It's tight but it works fine.
Last but not least, I got my Cobra muffler from Germany this morning.
Beautifull workmanship in stainlees steel.
It luckily went onto my GSXR 750 91 header with no problem.
Tomorrow the real test: will it fit on the bike?
Here's what it looks like:
DSCF6607_zpswb5ijueq.jpg


DSCF6608_zpsbrpvubly.jpg
 
The Cobra exhaust went onto the bike without any issue except that the intermediate pipe will have to be extended to take the frame extension into account.
Looks good to me?
DSCF6623_zpskahigsnw.jpg


DSCF6619_zpsceaipapl.jpg

Can't wait to do a back to back comparaison with the orange one
DSCF6630_zpsbdxxv6pi.jpg
 
Looks good to me also. That first view makes me wonder how the bike would look naked or semi naked, as it seat / tail and perhaps a bikini fairing. I love the aluminum frame and exposed engine.
 
Looks great! Is the header a 4 into 1 or 4 into 2 into 1?

Either way ground clearance looks acceptable.
 
Looks good to me also. That first view makes me wonder how the bike would look naked or semi naked, as it seat / tail and perhaps a bikini fairing. I love the aluminum frame and exposed engine.
Thanks!
I will definitely not use a full fairing on the bike.
Currently I'm investigating using the upper part of the CBR 600 model 98-99 fairing.
Poly 26 in France sells a replica ( model # 530) that can be used with two round headlights.
http://www.poly26.com/carenage-moto-tuning-honda-600-cbr-1988-1990_2-5.html
It should have enough of the period look while beeing able to accomodate clip-ons above the triple tree.
Will it be wide enough is the question?
 
Looks great! Is the header a 4 into 1 or 4 into 2 into 1?

Either way ground clearance looks acceptable.
The header is the OEM header used on the GSXR 750 from 1991.
It's a 4 into 1 model with a twist as there is a horizontal plate at the end of the header so that in practice cylinders 1 and 3 get to mix just like 2 and 4 slightly before getting all together.
So it looks like a 4 into 1 from the outside but internally it's a 4 into 2 into 1 at least for a few centimeters.
I forgot if this approach boosts power versus torque as I know some bikes mix the exhaust gasses between the even and the odd cylinders?
 
Finally some progress...
The fins on the bottom engine cover got trimmed further to clear the headers but will require a little further grinding!
The front left engine bracket is now fully functional.
The headers got painted.
The exhaust midpipe got lengthened.
I had bought a small metal plate to mount the CDI to the battery box but I realized that stainless steel might be nice to look at but almost impossible to drill through!
Next step secure the muffler in place.

Here are the pictures:

DSCF6641_zpsizudjpxw.jpg


DSCF6644_zpseqtforng.jpg


DSCF6649_zpsrhobt0ds.jpg


DSCF6651_zpsnwrmnkos.jpg


DSCF6660_zpsat9acfuf.jpg


DSCF6663_zpsd7z9vmug.jpg
 
The seat came in today but needless to say it will require some work to fit it on the bike.
On one of the pictures, you will see the seat, the GSXR 1100 tank and a GS 1000 S fairing.
In the end, I wonder if this fairing would not be the most appropriate for the bike?
It would be attached to the frame instead of the front fork.
Given that the XR 41 was a transition model between the the GS 1000 ( for the engine) and the GSXR 750 for the frame it would add to the transition idea?
What do you think?

DSCF6664_zps1ubpmwun.jpg


DSCF6665_zpsq2pn0b99.jpg


DSCF6669_zpsqhlkezkc.jpg
 
I think it would add to the transition concept, however, for me the "S" fairing is not correct, as it sits.

I think it is not long enough on the bottom and not wide enough to encapsulate the front of the bike. I feel it needs to be larger but not go all the way down as to hide the engine, not sure if that makes sense?

cheers,
Daryl

Keep going though, this a very cool venture!
You are most probably right.
I have also looked at the "Moto Martin" fairing but it requires having the clip-ons below the triple tree.
It would have been fine when I was a little younger...
 
You are most probably right.
I have also looked at the "Moto Martin" fairing but it requires having the clip-ons below the triple tree.
It would have been fine when I was a little younger...

LOL, how true about the younger.....but then again we usually did not have the disposable cash for this type of fun!
 
The complete exhaust is now in place.
It's really tight under the engine despite shortening the fins quite a bit.
Good enough to get the engine started.
Next challenge will be to secure the seat from Airtech...
I've never done this before and I'm not quite sure how to go about doing so?
Here's what it looks like so far:

DSCF6684_zpssracfsdf.jpg


DSCF6680_zpskg5epmba.jpg

The trick I used to secure the exhaust header
DSCF6677_zpsffh0oop7.jpg

A mock up of the seat support
DSCF6678_zpsigx4hvde.jpg
 
That is the problem with the Airtech stuff; they seem to provide little more than a smooth outer skin. Are you going to fabricate that mount and bolt it on? Seems like you would still want a reinforced area to put a bolt through.
 
A favourite way of mine to mount fiberglass seats is to cut out a marine ply base piece and attatch it under the glass seat. Usually around 1/2in thick is adequate. Four bolts or screws with large flat washers under the heads holds the ply on. To hold to the frame, i usually do captive bolts through the ply. Heads recessed into the ply under the glass and nuts below the ply. This means that you can undo the seat mounts without having to remove any seat padding, and the fasteners are hidden too.
 
A favourite way of mine to mount fiberglass seats is to cut out a marine ply base piece and attatch it under the glass seat. Usually around 1/2in thick is adequate. Four bolts or screws with large flat washers under the heads holds the ply on. To hold to the frame, i usually do captive bolts through the ply. Heads recessed into the ply under the glass and nuts below the ply. This means that you can undo the seat mounts without having to remove any seat padding, and the fasteners are hidden too.
Excellent idea!
Thanks Greg
 
The seat attachment has moved forward!
Given that the seat base is much higher than the frame rails, I decided to build a kind of pyramid to get to the required height.
The lower layer comes from my spare frame and is attached through 4 silentblocs not so much to quell any vibration but to clear the battery box fittings.
This layer will also accomodate the Regulator Rectifier on a welded aluminum plate as a base.
The next two layers ( in wood on the picture but later in aluminum) will be solidly attached to the seat base.
Four vertical straps will be welded on the aluminum frame just below the transversal wood beams in order to get an horizontal bolt through the top of them to secure the transversal wood beams.
The bolts will be accessed through small holes in the side of the seat.
This should allow an easy removal of the seat for maintenance purposes.
It's getting frighteningly close to getting the bike to run...

DSCF6695_zpsjb3evavt.jpg


DSCF6697_zpsrq7csud5.jpg
 
Back
Top