• Required reading for all forum users!!!

    Welcome!
    Register to access the full functionality of the GSResources forum. Until you register and activate your account you will not have full forum access, nor will you be able to post or reply to messages.

    A note to new registrants...
    All new forum registrations must be activated via email before you have full access to the forum.

    A Special Note about Email accounts!
    DO NOT SIGN UP USING hotmail, outlook, gmx, sbcglobal, att, bellsouth or email.com. They delete our forum signup emails.

    A note to old forum members...
    I receive numerous requests from people who can no longer log in because their accounts were deleted. As mentioned in the forum FAQ, user accounts are deleted if you haven't logged in for the past 6 months. If you can't log in, then create a new forum account. If you don't get an error message, then check your email account for an activation message. If you get a message stating that the email address is already in use, then your account still exists so follow the instructions in the forum FAQ for resetting your password.

    Have you forgotten your password or have a new email address? Then read the forum FAQ for details on how to reset it.

    Any email requests for "can't log in anymore" problems or "lost my password" problems will be deleted. Read the forum FAQ and follow the instructions there - that's what we have one for...

  • Returning Visitors

    If you are a returning visitor who never received your confirmation email, then odds are your email provider is blockinig emails from our server. The only thing that can be done to get around this is you will have to try creating another forum account using an email address from another domain.

    If you are a returning visitor to the forum and can't log in using your old forum name and password but used to be able to then chances are your account is deleted. Purges of the databases are done regularly. You will have to create a new forum account and you should be all set.

GS750 back to nice.

  • Thread starter Thread starter Drummert
  • Start date Start date
Actually, I was able to order the berrymans dip through Amazon Prime, using the 30 day prime trial. Did cost a bit, but still cheaper than getting the carbs cleaned ultrasonic. It's really stupid that sometimes it is actually cheaper to order some things overseas.

Now lets hope customs will be nice to me.
 
Allright,


So I derusted the tank, cleaned the petcock and took the carbs and air filter of so i can start cleaning them. I also took measurements of the shims, so I can order some replacements.
This all raised two questions:

1.
The air filter is really dirty. And I mean really dirty. There is a lot of oil on both the inside and the outside. Is this normal or did something cause it? My guess would be it came through the breather hose towards the air filter.

2.
I found the pdfs for the petcock rebuild and the carbs. They mention some greases and silicon gasket maker. We didn't have any, so I started looking for some. Turns out there's a lot of greasy stuff around and I can't tell which brand/type I should pick up... Any preferred brands or types to look for?


Other than that, this project is actually easier than expected! (for now)
 
It's normal to have oil on the air filter foam. In fact, when you replace it, the instructions call for soaking the foam in motor oil & ringing it out prior to installation.

High temp synthetic grease for pivots on the slide assemblies on the carbs.

High temp bearing grease for the carb o-rings & the cylinder head boots
 
So I'm taking the carbs apart at the moment and I noticed that for both the carbs I've done so far, the plates that are on the slide (the black one where the lever mounts onto the slide as far as I can see in the VM rebuild manual) are missing. The metal plate with three holes is just directly making contact with the slide.

Should I try and find this part again or can I leave it out like it is at this moment? I already started looking for it, thinking the part no. is 13581 - 47010, but what I find is either a plate with only two holes (might be right) or they aren't in stock anymore...


It's normal to have oil on the air filter foam. In fact, when you replace it, the instructions call for soaking the foam in motor oil & ringing it out prior to installation.

I saw that in the manual. The thing is, not only the filter is dirty with oil. The whole airbox is a mess. Both inside and outside. I would say it has been submerged in oil... I also found that one of the hoses collapsed inwards. I just decided to replace all the hoses (they were very stiff as a lot of people around here already mention) and also ordered some new intake boots. They looked o.k. on the bike, but I am just making sure.
 
So I figured I could put some photo's up:

Start:


Cleaning the tank and letting it dry again. It was freaking cold...


Cleaning the petcock


Removed the airbox. Starting to remove the carbs.


Thats damaged...


Getting the valve shim clearances


Much better


Onto the carbs:


Not my definition of 'round'.


Looking at the state of the O-rings, that's probably a part of the problems already. I decided to buy new boots also, just to make sure...


Carbs part 2:

Had to use the rubber part of the hammer to get the float bowls loosened up. Took me ages to get them off.


First carb has been rebuild now.


My carb area.

 
Great progress, Drummert.
Hopefully the new valve cover gasket will help with the grunge covered carbs and airbox.
Hammers are only supposed to be used for electrical problems. haha.
 
Haha, yeah. It didn't feel good using a hammer, but no smashing in the process. Just gentle taps. Wouldn't want to mess up the bowls.
 
So, I took the last one apart today, and the spring under the pilot air screw didnt come out (or isn't there). I made these pictures, what do you guys think: spring still in there, but all the way in the back or no spring?


I also made a before-dip photo of the small parts. After photo will come. So first, before lipton ice ^^:


Allright, time for an update. Pictures first:

First of: the last parts are clean now.


Started working on the airbox:


those were definitely in need of replacement


And thats not going to seal right.


Ok. Time for a story now. I put the carbs back to the plate. Screwed them on there and used some locktite. Then I found out I forgot a part. Quite the important part as well: the part were the throttle cable attaches on to. And there was no possible way to squirm it past the carbs. So, I needed to unscrew the carbs again. Here I learned a valuable life lessson: Dont Underestimate The Power Of Locktite...

So the back of the bottle said it was supposed to dry in about 15 minutes. It actually did the job in about a minute and I had myself a problem. Some screws came out. One screw absolutely didn't on carb three (exactly the one I needed to remove to put the throttle attachment in there).

So, I tried heating it up a bit with a soldering iron. No go. Hairdryer? No go. Heat gun? No go. At this point, the philips head was gone and left a perfectly round hole on top. Lesson two learned: Buy an impact driver before you need an impact driver!

Next day I came back with the new impact driver and a dremel. I made a flat driver slot with the engraving tool, careful not to get any metal parts in the carb and got the impact driver in. Two hits was all it took:


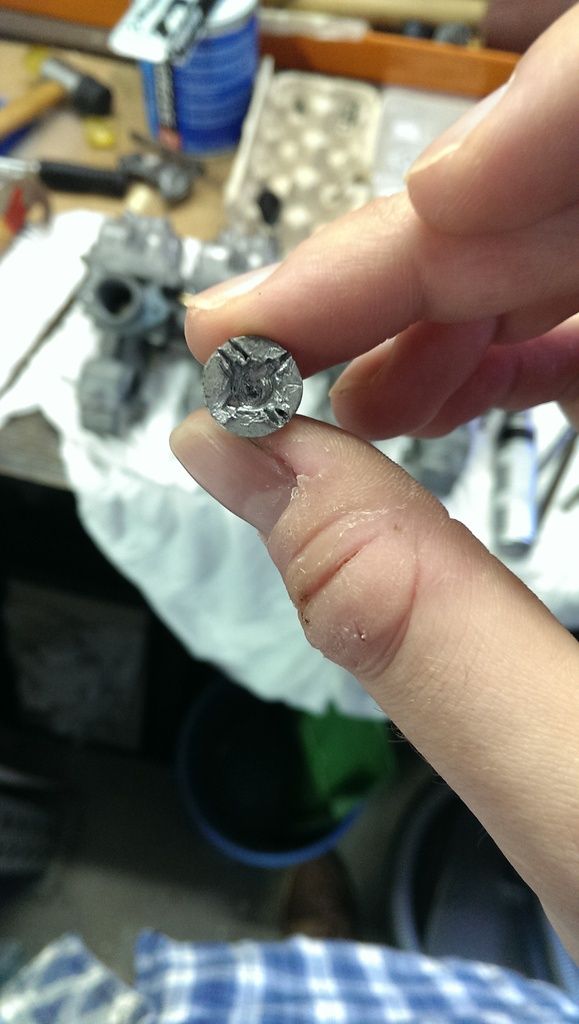
Thats what I was left with.

I decided to buy 8 new screws like that and just keep the old one as spares.

After this, I put it back together the right way. Then, whilst tightening the bolt on carb one which attaches the throttle valve pivot to the throttle shaft, I found that bolt kept on turning. Apparently, my torque wrench didn't click and I broke of the bolt, leaving part of the bolt in the throttle shaft (ofcourse...).

Again, time for the dremel: I put the carbs in a position, so the metal filings wouldnt go into the carbs, got the engraving tool and carefully took of the top of the bolt still left in the shaft, without trying to damage the pivot or shaft ofcourse. About an hour later I finally got the shaft out of the carbs and was able to try and get the rest of the bolt out. I had to drill right through it and take it out afterwards with a lefthanded drill. After taking the bolt out, I saw that I (fortunately) didn't go through the side of the bolt and didn't damage the shaft. Lucky me.

So I changed my order for the other screws and put in an extra bolt.

After this, I checked the torque wrench, which apparently wasn't yet greased up enough for the mechanism to work. After this it worked as it's supposed to and the other bolts weren't a problem. Lesson three learned: check your tools.

I expect the last of the gaskets to arrive next week. The airbox is almost airtight again and the carbs only need a few screws to arrive. Hopefully the bike will be running again in two weeks.

Which would be a great thing. I just crashed my newer bike last Friday. Driver in front of me hit the brakes mid-turn on a crossing with no reason. Had to hit my brakes as well and tipped over. The driver in front of me just rode on. Hopefully the insurance company will cover the repair, but i'm afraid they won't in this case. The others at the crossing weren't able to see the license plate.
 
Last edited:
Tough luck on the spill, Drummert.
I like following along on these restos. Always seem to find a tip for my own projects.
Finally, a hammer in the last pic...now you are getting the hang of it.
 
Quick question guys:

I took of the RH cover to clean the oil inspector and get a new gasket in there. The screws were a mess, so I replaced them with zinc plated steel allen heads. Some research on the interwebs told me to use zinc galvanised screws, but now I see most of the guys here are just using stainless steel, which, I would think, causes a reaction between the aluminum and the screw and would mean corrossion.

Whats best to use in your personal experiences?
 
I never had a problem with stainless allen heads on engine covers, you could use a bit of neverseize if you are worried. Stainless bolts for the header are more of an issue I ALWAYS use neverseize on those, stainless or not.
 
Allright. Good thing: The bike is back together and running again. But:

Apparently there's something wrong with right exhaust. I started the bike and noticed there was now smoke coming from the 4th cylinder. I first thought it was a gasket not sealing well, but I saw the smoke coming from the exhaust clamp on the cylinder. So I hit the killswitch and started investigating: a quick, light pull on the exhaust showed me the exhaust can move away from the cylinder. I don't see it coming out of the clamp, but it moves. The other obviously don't.

I already read about the bolts becoming stuck over the years somewhere around here, so I decided to first take my chances with some evaporust. I just soaked some paper towels in it and put them on there, tied with some tie-wrap. I already know the bolts are very rusted, the wrench didn't catch on them.

By the way, I never saw I had this problem before I cleaned the carbs and airbox and put on new intake boots/airbox boots.

So, until I'm actually able to look at the connection myself, question: What might be my problem? Is it the gasket in there? Or might the exhaust have rusted away in there? Any thoughts on this?
 
I would start by replacing the exhaust gaskets inside the ports as well as the gaskets at the pipe joints;
 
So I tried to remove the exhaust today. First bolt went out, unfortunately the other bolt didn't, so that one's still stuck in there. I was able to get the clamp out of the way though, so this is what I saw:


That looks very much like a exhaust which has rusted all the way through... Not what I was hoping for. So I started trying to get the exhaust of the bike, but I can't as of yet get it out of the pipe under the bike.

So, new list:

- Get the exhaust of
- Get the washer and last bit of pipe out of the cylinder
- Get the bolt out

Anything to look out for/be careful with? I already thought of carefully drilling the bolt with a small drill, then get a lefthanded drill in there so it will (hopefully) turn itself outward.


Apparently what they say is true: fix one thing, find something else to fix on the go...
 
Quick question guys:

I took of the RH cover to clean the oil inspector and get a new gasket in there. The screws were a mess, so I replaced them with zinc plated steel allen heads. Some research on the interwebs told me to use zinc galvanised screws, but now I see most of the guys here are just using stainless steel, which, I would think, causes a reaction between the aluminum and the screw and would mean corrossion.

Whats best to use in your personal experiences?
Rookie question: what's behind that right cover? Would I need to drain the oil before removing the cover to clean the oil window? You mention a gasket which makes me think I would have to drain it. I have my stainless bolts ready to go.

About those discs between slide and throttle linkage...my carbs are "missing" them as well. I wonder if they were added in later years.
 
Back
Top