• Required reading for all forum users!!!

    Welcome!
    Register to access the full functionality of the GSResources forum. Until you register and activate your account you will not have full forum access, nor will you be able to post or reply to messages.

    A note to new registrants...
    All new forum registrations must be activated via email before you have full access to the forum.

    A Special Note about Email accounts!
    DO NOT SIGN UP USING hotmail, outlook, gmx, sbcglobal, att, bellsouth or email.com. They delete our forum signup emails.

    A note to old forum members...
    I receive numerous requests from people who can no longer log in because their accounts were deleted. As mentioned in the forum FAQ, user accounts are deleted if you haven't logged in for the past 6 months. If you can't log in, then create a new forum account. If you don't get an error message, then check your email account for an activation message. If you get a message stating that the email address is already in use, then your account still exists so follow the instructions in the forum FAQ for resetting your password.

    Have you forgotten your password or have a new email address? Then read the forum FAQ for details on how to reset it.

    Any email requests for "can't log in anymore" problems or "lost my password" problems will be deleted. Read the forum FAQ and follow the instructions there - that's what we have one for...

  • Returning Visitors

    If you are a returning visitor who never received your confirmation email, then odds are your email provider is blockinig emails from our server. The only thing that can be done to get around this is you will have to try creating another forum account using an email address from another domain.

    If you are a returning visitor to the forum and can't log in using your old forum name and password but used to be able to then chances are your account is deleted. Purges of the databases are done regularly. You will have to create a new forum account and you should be all set.

Updgardinr 1100ES Brakes

Greg B

Forum Mentor
Past Site Supporter
Having a nice 4 day weekend, I decided to get started on my brake upgrade.
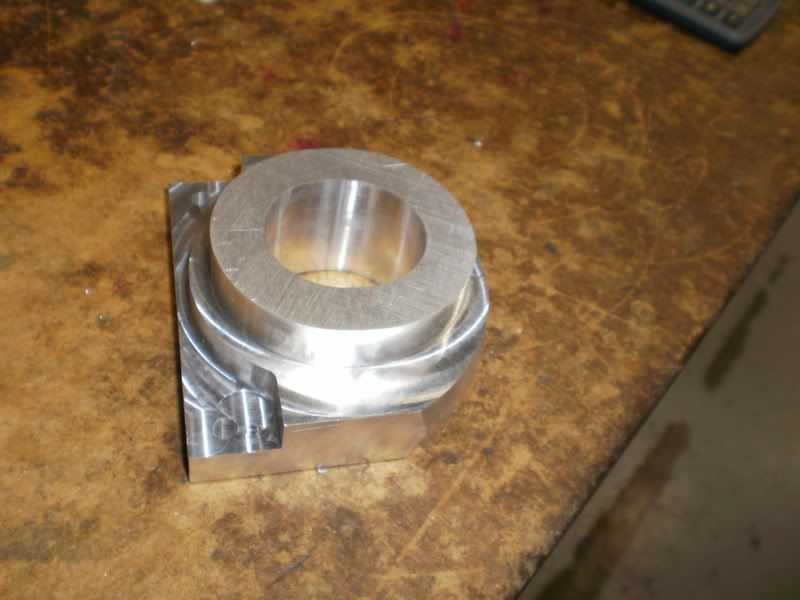
Here's where I'm at so far.
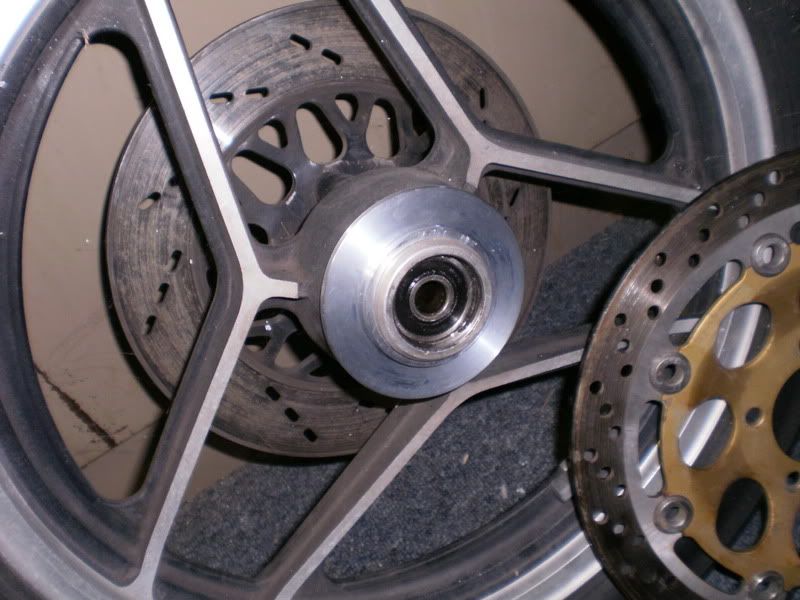
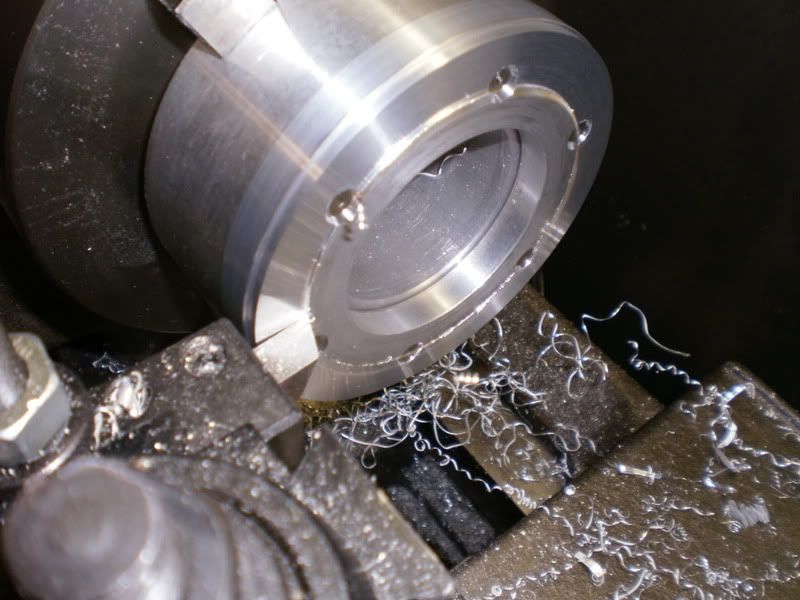
The rotors have a much larger center hole than the hubs on my wheel. Plus I needed to move the rotor out about 1/8" (or 3mm if you prefer).
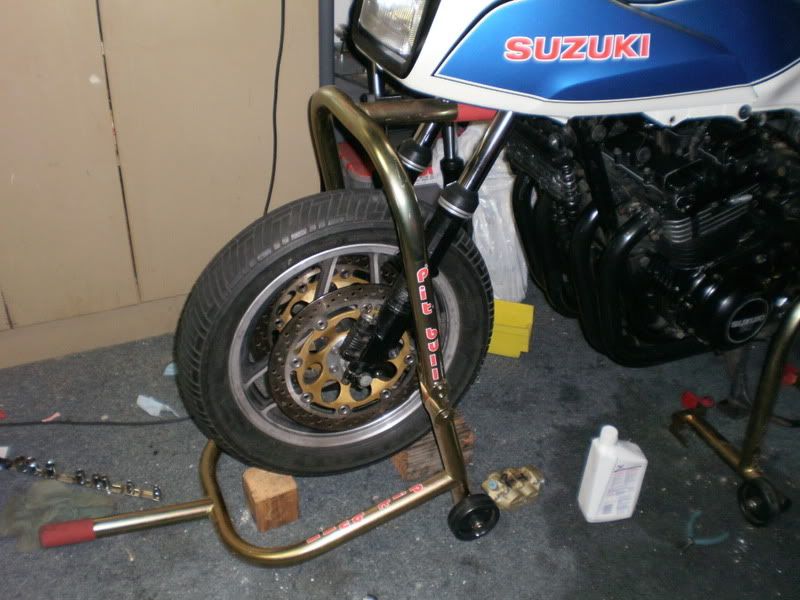
Wheel is a 16 incher from an '85 750ES.
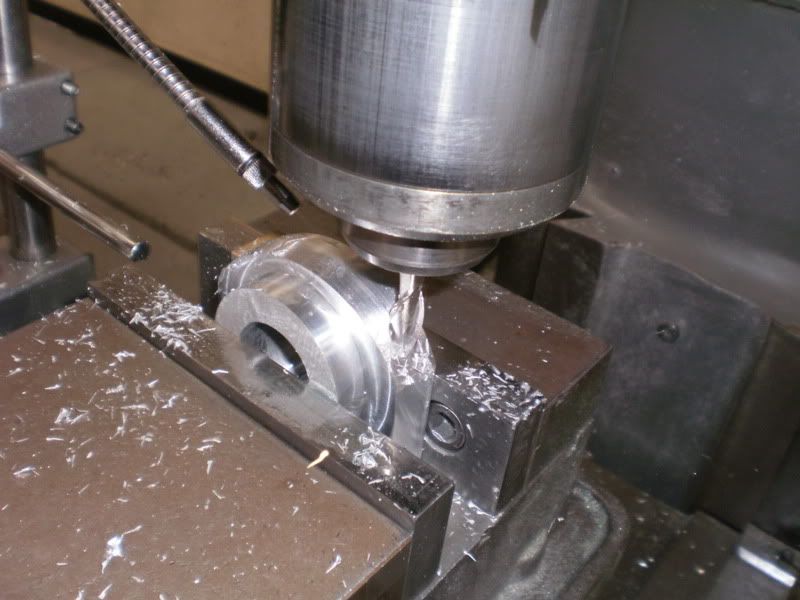
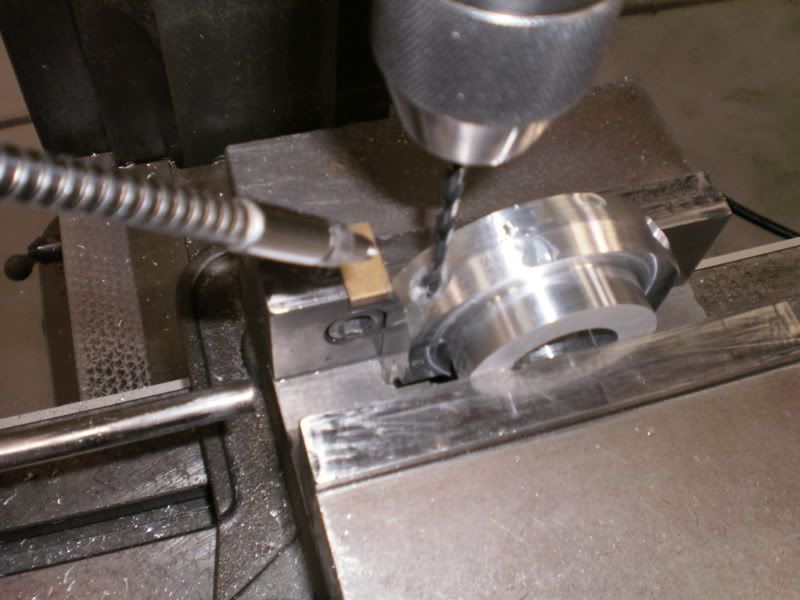
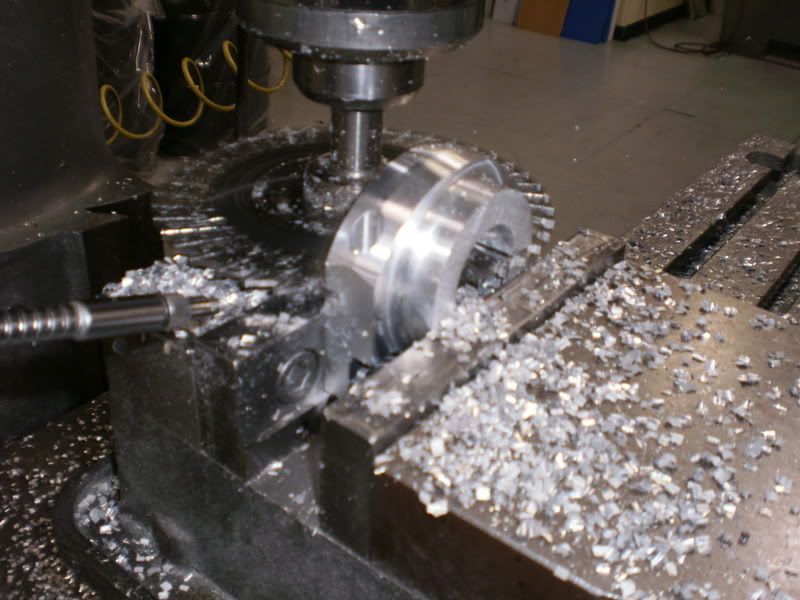
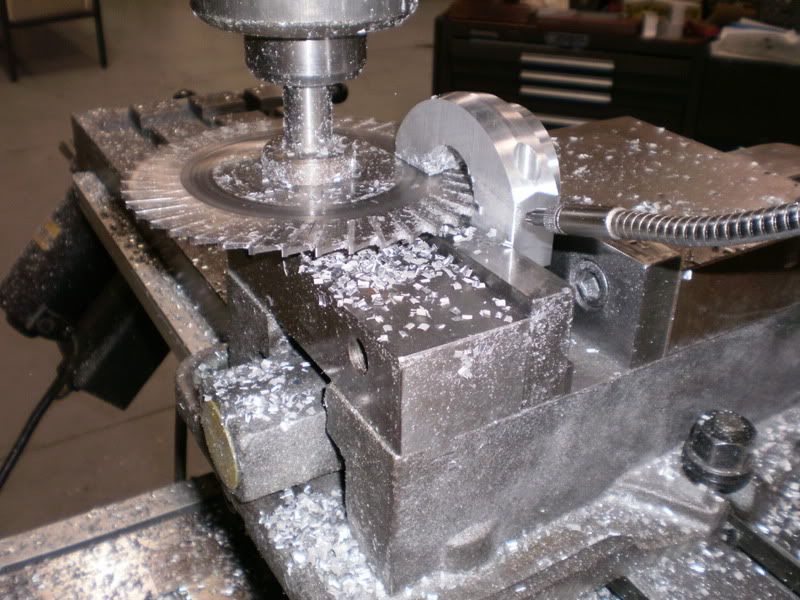
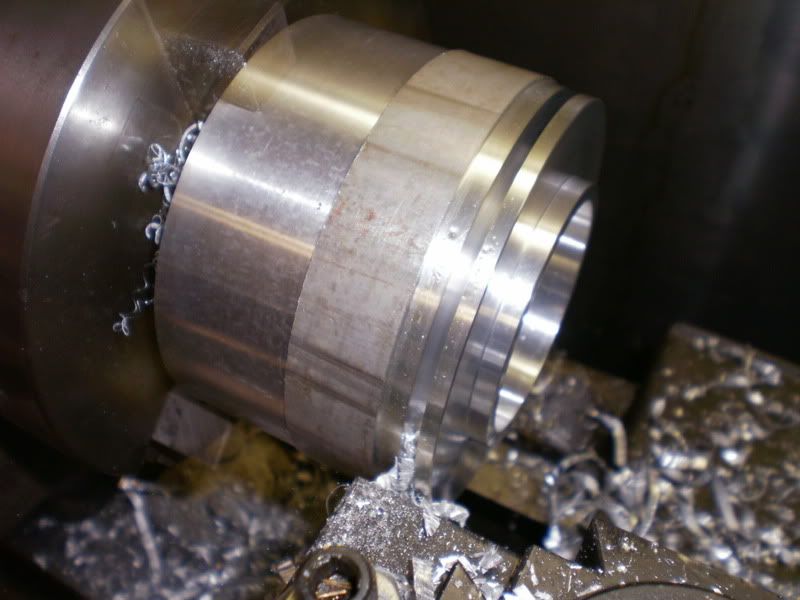
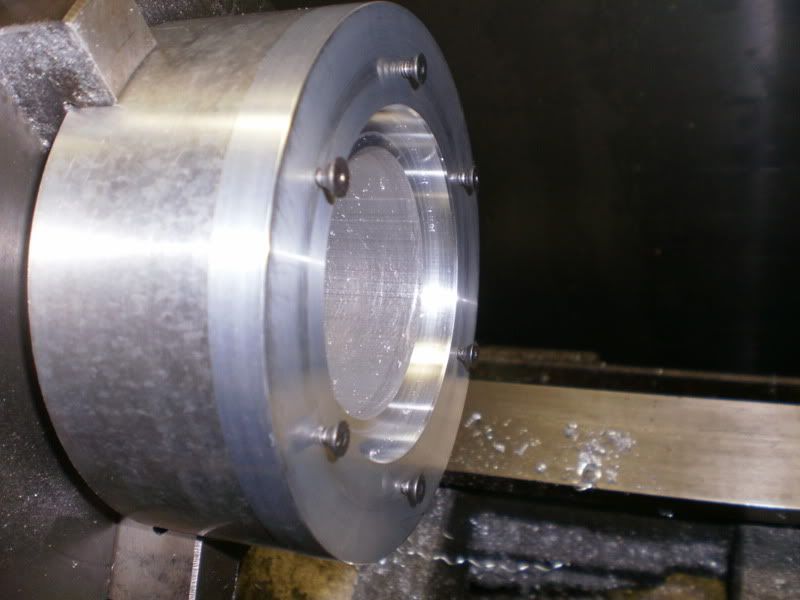
So I needed to machine a pair of adapters.
Brembo001.jpg

Brembo002.jpg


Looking good so far.
Brembo003.jpg

Brembo004.jpg


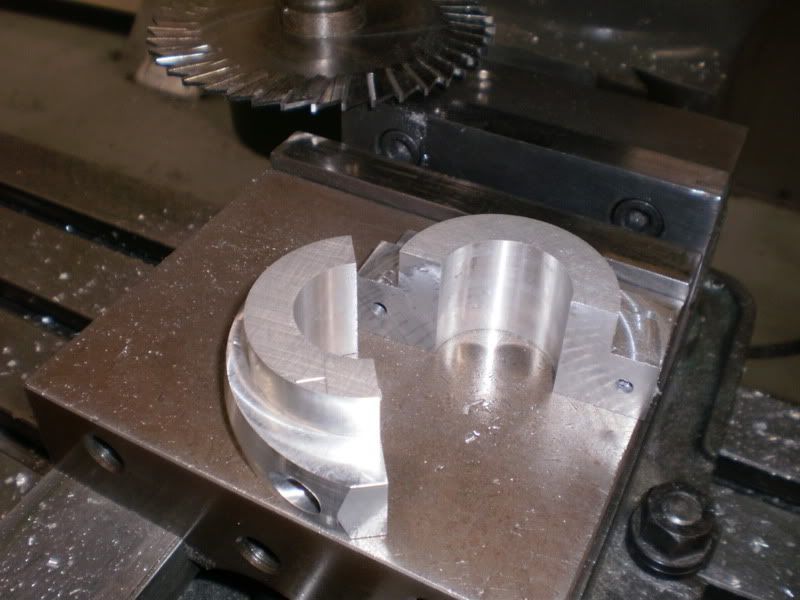
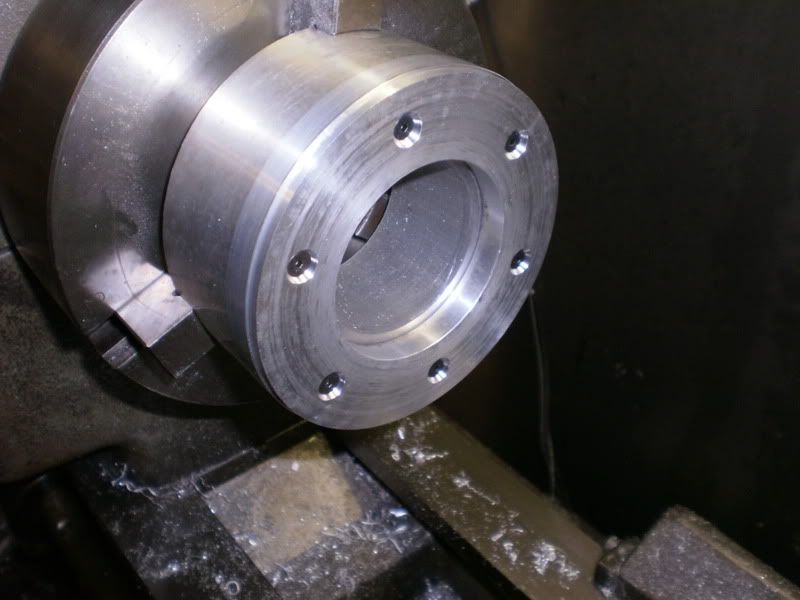
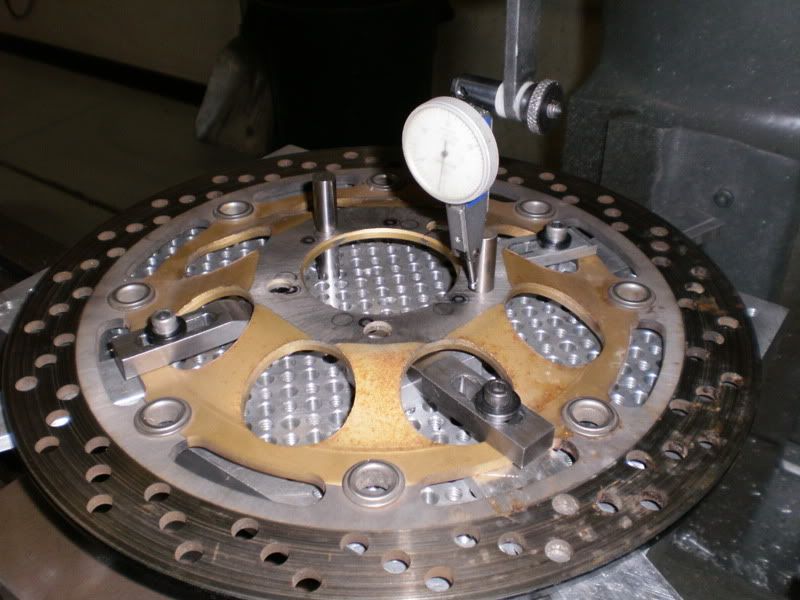
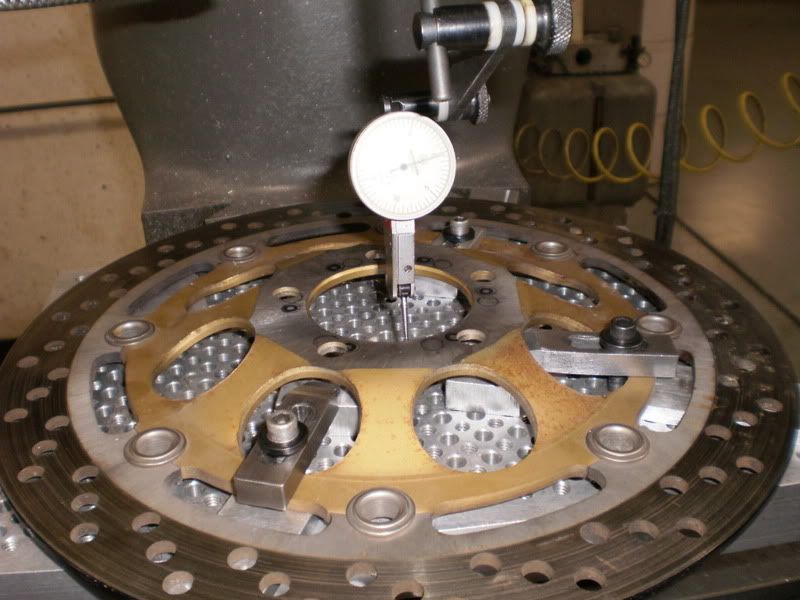
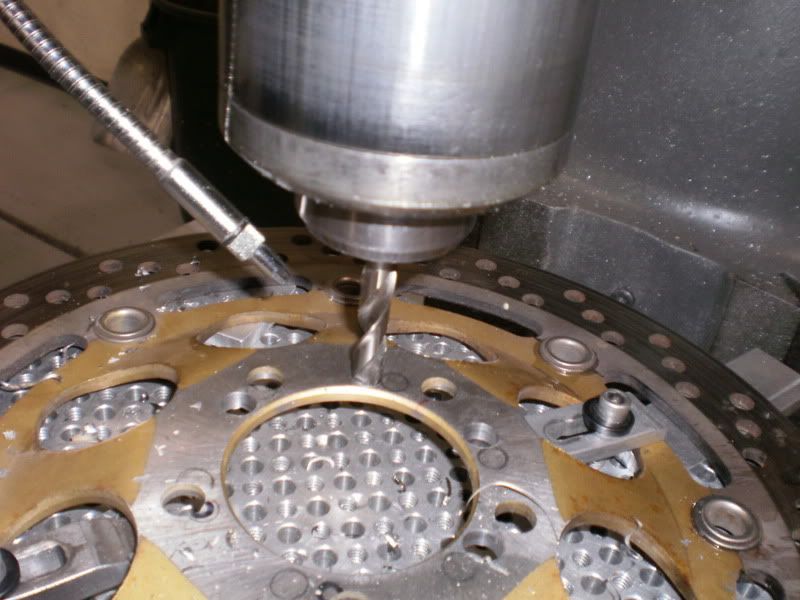
I also made a pair of cover plates so I can sandwich the rotor since I will also have to put a six bolt hole pattern to match the wheel.
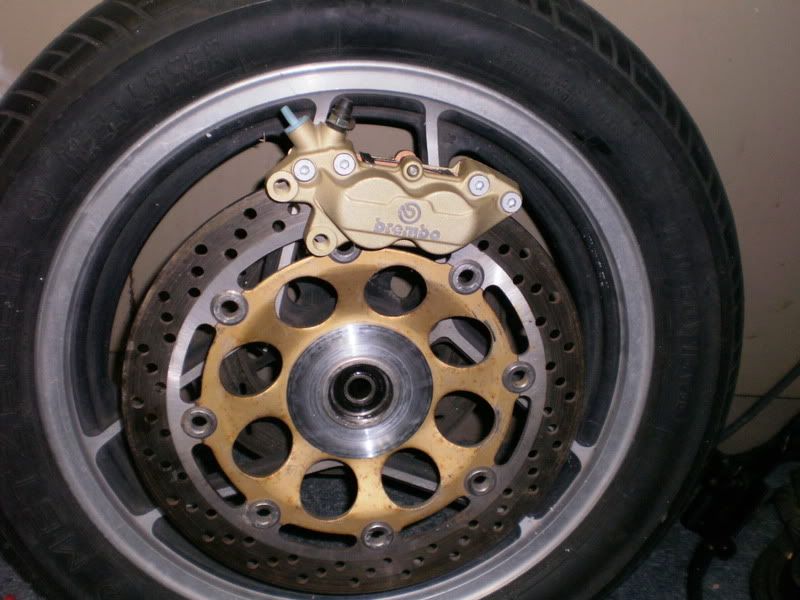
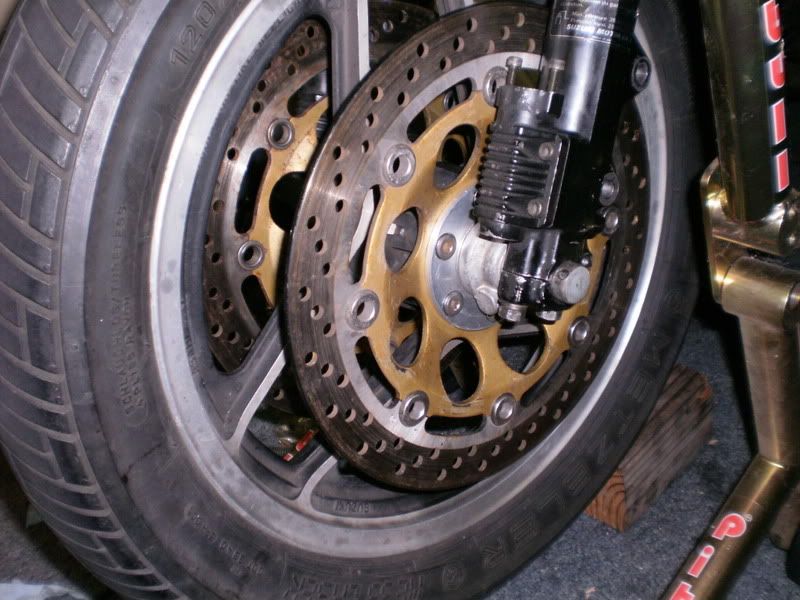
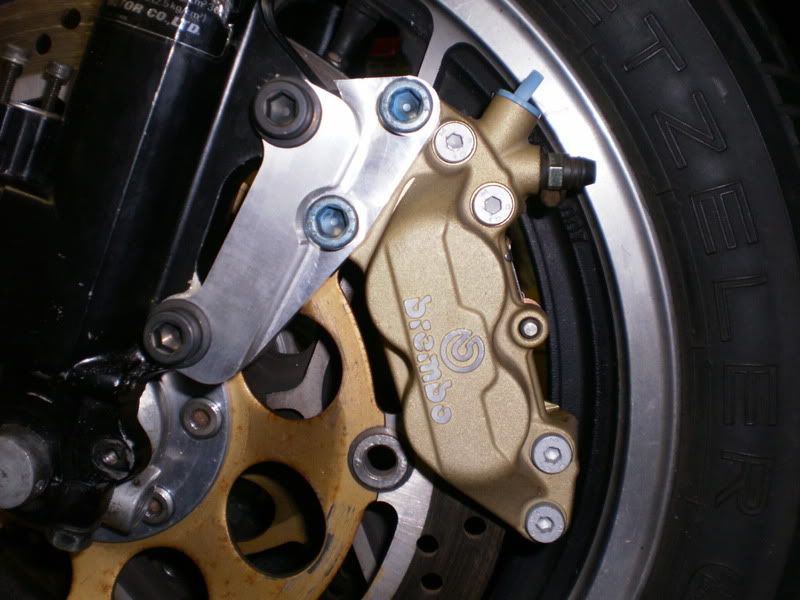
Four piston Brembos + 310mm rotors.
And yes I still need to make adapters to mount the calipers to the forks.
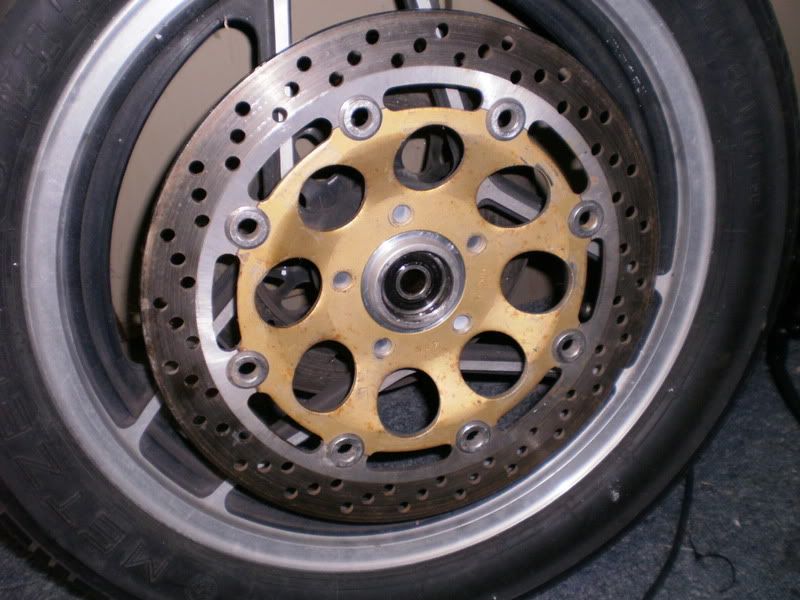
Brembo005.jpg
 
Last edited:
Im in the middle of the same upgrade to my 1000G, im making the caliper brackets at the moment.
I look forward to seeing your results.
 
I guess you are asking Greg, since its his thread and all, but i will tell you what i have.
Same Calipers, mine are off a RS250 Aprillia, so are the rotors i am using, they are different to Gregs, and i am using a radial master cylinder.

What Bike
What rotors
What calipers

Looks like a cool upgrade
 
I guess you are asking Greg, since its his thread and all, but i will tell you what i have.
Same Calipers, mine are off a RS250 Aprillia, so are the rotors i am using, they are different to Gregs, and i am using a radial master cylinder.

What bike? Are you going to post pics?


I found this............

http://en.wikipedia.org/wiki/Aprilia_RS250

The front brakes of the RS 250 are Brembo dual 298 mm discs with Brembo Oro four-piston calipers. The rear brake is a single 220 mm disc with a Brembo twin-piston caliper.
The front & rear rims are lightweight, 5 spokes, cast aluminum rims are 3.50x17 up front (3.0x17 on the older models) and 4.50x17 out back that require tires of 120/60x17 and 150/60x17, respectively.
 
Last edited:
The guy I got the rotors from said they were Brembos, but there is no part # by which to verify. But I can't see any reason to doubt him.
The calipers I picked on CL for $75 for the pair. So major score there.
The wheel is from a 750ES, and is going on my '83 GS1100ES. Bye bye 19" front wheel.
Ought to quicken the steering up a bit. Using the whole 750 front end, with clip-ons from a Honda NS400R. Not a lot of difference in weight between the 1100 & 750. Plus the 750 forks are longer & will help make up the difference in wheel sizes.
 
Last edited:
The guy I got the rotors from said they were Brembos, but there is no part # by wich to verify. But I can't see any reason to doubt him.
The calipers I picked on CL for $75 for the pair. So major score there.
The wheel is from a 750ES, and is going on my '83 GS1100ES. Bye bye 19" front wheel.
Ought to quicken the steering up a bit. Using the whole 750 front end, with clip-ons from a Honda NS400R. Not a lot of difference in weight between the 1100 & 750. Plus the 750 forks are longer & will help make up the difference in wheel sizes.

Sounds like a good project, will it muck up the geometry a bit?

Yes Jwhelan, thats wood i wanted to get a rough idea on shape before i started cutting the alloy.
 
Since the 750 forks are longer than the 1100 forks, & with the clip-ons mounted above the triple clamps, I end up losing about 1/2" of ride height. That's with Progressive springs with 1.25" long spacer. So I don't think it will be too twitchy. But I do plan on installing a steering damper as well.
 
A Little Farther Along, More Photos

A Little Farther Along, More Photos

Brembo008.jpg

I needed to face the backside of my spacer parallel to the side that the rotor mounts against.
Used the same piece of material to make a fixture to hold the parts on the lathe.

Brembo006.jpg

Drilled and countersunk holes, bolted to the fixture. these holes will be opened up later for the rotor bolts. Fixture was faced previously so that the it ran true.

Brembo007.jpg

Machining the spacer to size. When finished, they measured dead parallel.
 
Last edited:
More Photos

More Photos

Brembo009.jpg

Setting up the rotors to put the new hole pattern in them.

Brembo010.jpg

Indicating the center hole.

Brembo011.jpg

Drilling & reaming the new holes.

Brembo012.jpg

Back on the bike.

Brembo013.jpg

Now I need to design & machine the caliper brackets.
I think I'm going to need to make a nice fork brace also.
After all the parts are done, I'll have them all hard anodized black.
More photos soon. I hope.
 
Test fitting

Test fitting

Brembo003-1.jpg

A bit overkill, perhaps, but it makes me feel better.
Brembo001-1.jpg


Brembo002-1.jpg

Pretty happy with how they turned out. (At least the second time. Sometimes you gotta start cutting to see how it all goes together)
I neglected to take photos while I was making these, but oh well. And yes, I am well aware that the bleed screw points straight back. but I'll deal with it.

I did make a little video of one of the operations. Sorry, it's a little boring. And sorry for the jerky camera work.
http://www.youtube.com/watch?v=pYG4Kp0YZOI
 
Last edited:
I like the way your hanger brackets sandwich the fork lugs instead of just bolting through the lugs. It should be much stronger that way? Anything difficult about making them work that way? All the lugs the same & in the same places on both sides or did you have to do any special machining to get them to work this way? Thanks, Ray.
 
I like the way your hanger brackets sandwich the fork lugs instead of just bolting through the lugs. It should be much stronger that way? Anything difficult about making them work that way? All the lugs the same & in the same places on both sides or did you have to do any special machining to get them to work this way? Thanks, Ray.

That is a very nice brake hanger adapter. Are most of these sandwiched? It certainly should flex less. Is it made of two or three pieces?
 
It's ONE piece Jim!!! I've seen them & know the story but wanted to get Greg to go into a little more detail on how they are made! :D That's the ES I sold him in case you didn't know. Ray.
 
On to the Fork Brace

On to the Fork Brace

A few more fun photos. Enjoy.
forkbrace003.jpg

I forgot my camera when I machined the main clamp, but this is how they turned out.

forkbrace004.jpg

forkbrace005.jpg

Counter boring & drilling the bolt holes.
forkbrace006.jpg

forkbrace008.jpg

Sawing the clamp in half.

forkbrace007.jpg

Mostly done. After I tap the holes, I'll bolt the halves together, set up in the lathe, & finish bore the clamp to fit the fork legs. And machine the groove for the dust caps.
More later.
 
Greg, That is a fantastic looking upgrade! At first I thought those were gs500e/ katana 600/750 rotors, but it looks like there is too much offset.
 
Last edited:
Back
Top