-
Required reading for all forum users!!!
Welcome!
Register to access the full functionality of the GSResources forum. Until you register and activate your account you will not have full forum access, nor will you be able to post or reply to messages.A note to new registrants...
All new forum registrations must be activated via email before you have full access to the forum.A Special Note about Email accounts!
DO NOT SIGN UP USING hotmail, outlook, gmx, sbcglobal, att, bellsouth or email.com. They delete our forum signup emails.A note to old forum members...
I receive numerous requests from people who can no longer log in because their accounts were deleted. As mentioned in the forum FAQ, user accounts are deleted if you haven't logged in for the past 6 months. If you can't log in, then create a new forum account. If you don't get an error message, then check your email account for an activation message. If you get a message stating that the email address is already in use, then your account still exists so follow the instructions in the forum FAQ for resetting your password.Have you forgotten your password or have a new email address? Then read the forum FAQ for details on how to reset it.
Any email requests for "can't log in anymore" problems or "lost my password" problems will be deleted. Read the forum FAQ and follow the instructions there - that's what we have one for...
-
Returning Visitors
If you are a returning visitor who never received your confirmation email, then odds are your email provider is blockinig emails from our server. The only thing that can be done to get around this is you will have to try creating another forum account using an email address from another domain.
If you are a returning visitor to the forum and can't log in using your old forum name and password but used to be able to then chances are your account is deleted. Purges of the databases are done regularly. You will have to create a new forum account and you should be all set.
You should upgrade or use an alternative browser.
1981 gs750 (gs750e) Retro Racer project
- Thread starter LarsKroghStea
- Start date
LarsKroghStea
Forum Mentor
This is the one. I was looking for 63mm in size, but i think this is the biggest. You could use something like this if you coud find it with the right measurements:
https://www.ebay.com/itm/Motorcycle...454798?hash=item23a72aca8e:g:dL8AAOSwvAhbZ7C8
https://www.ebay.com/itm/61mm-Black...e=STRK:MEBIDX:IT&_trksid=p2057872.m2749.l2649
This is the one. I was looking for 63mm in size, but i think this is the biggest. You could use something like this if you coud find it with the right measurements:
https://www.ebay.com/itm/Motorcycle...454798?hash=item23a72aca8e:g:dL8AAOSwvAhbZ7C8
Many thanks!
I can tell you that my Devil muffler looks identical from a fabrication standpoint and I didn't even try it without a dB killer and it's still loud !
LarsKroghStea
Forum Mentor
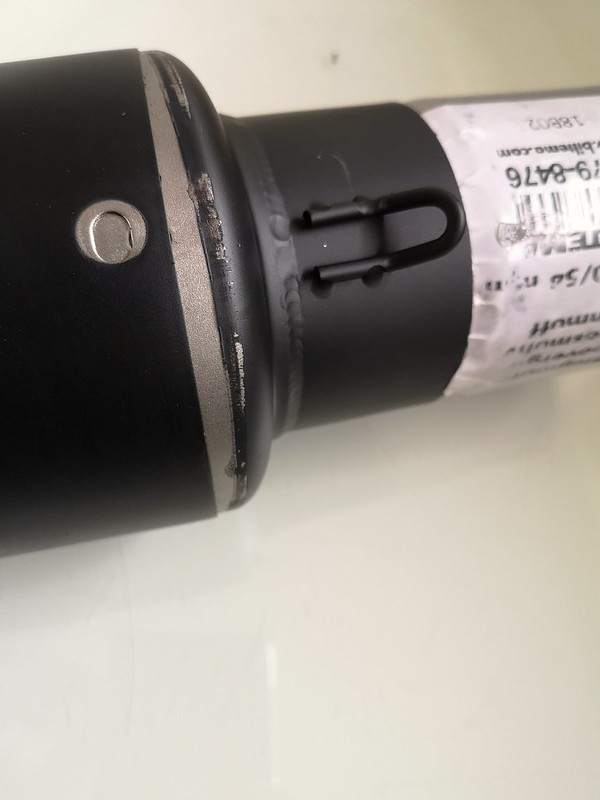 Clipped rivet by Lars Krogh-Stea, on Flickr
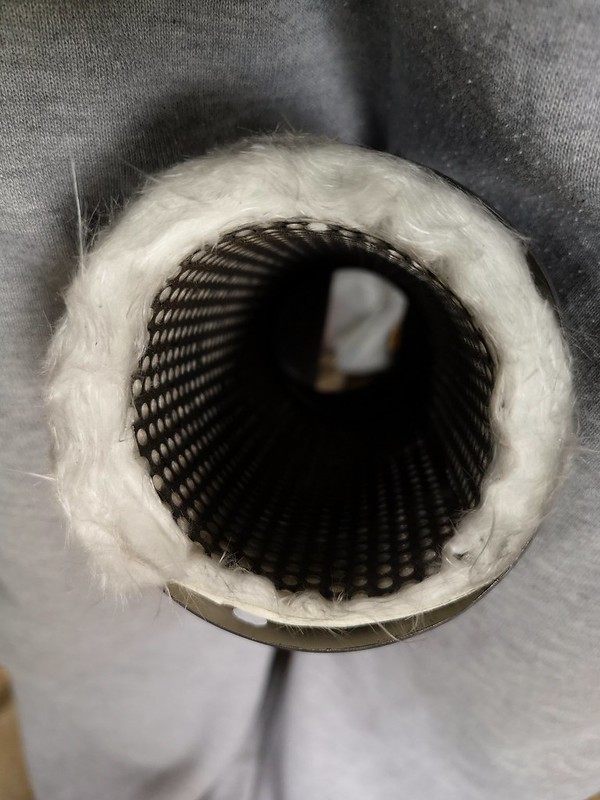 Stuffing by Lars Krogh-Stea, on Flickr
Hammered lightly on the inner ring to set the pieces together.
 Separated by Lars Krogh-Stea, on Flickr
Put it back together with new pop rivets. From now I'll treat the two parts as one and mask off the bend before I powdercoat the muffler.
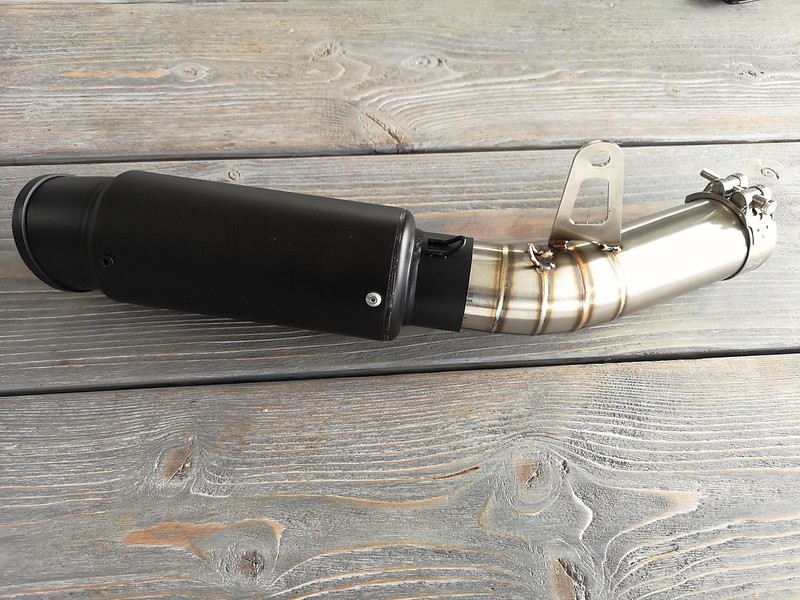 Back together by Lars Krogh-Stea, on Flickr
LarsKroghStea
Forum Mentor
")
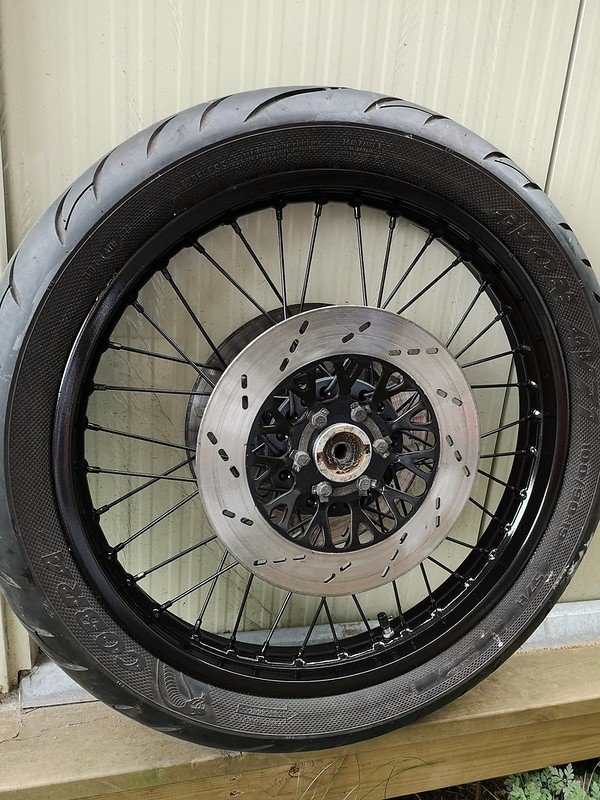 Front wherl by Lars Krogh-Stea, on Flickr
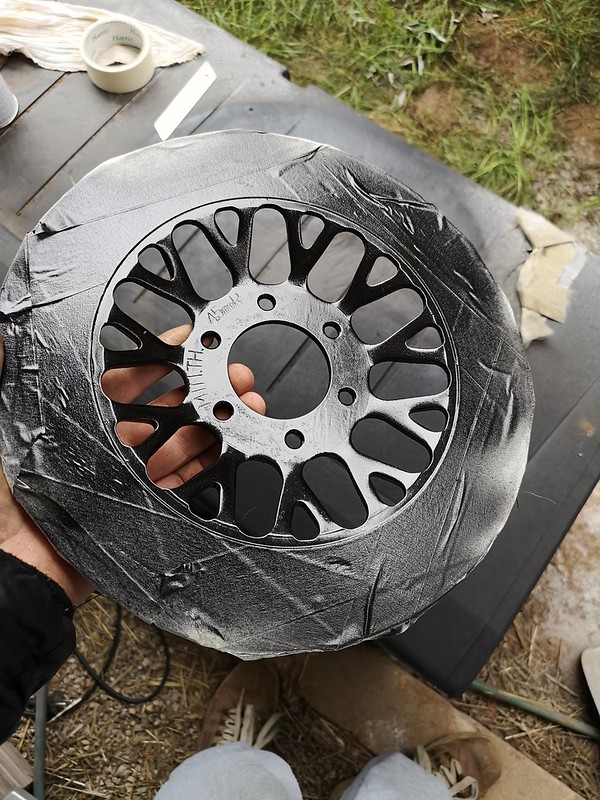 Disc by Lars Krogh-Stea, on Flickr
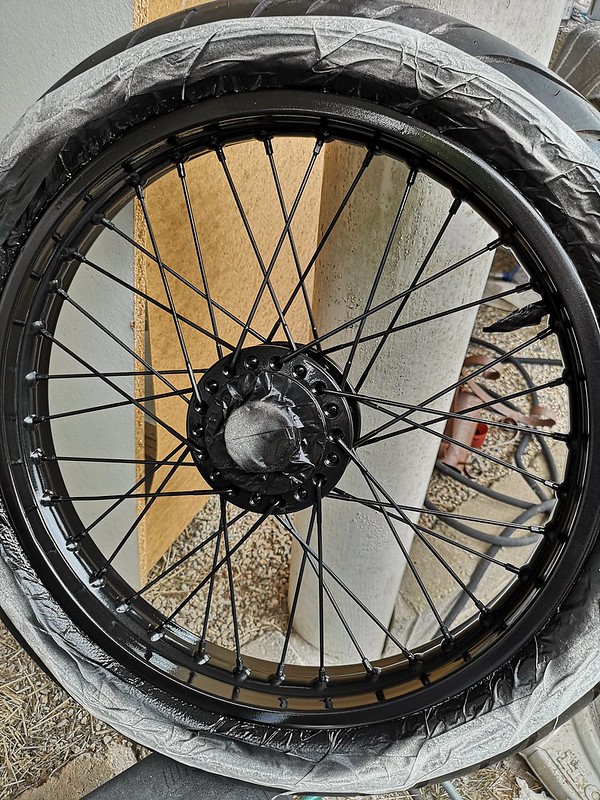 Rim painted by Lars Krogh-Stea, on Flickr
LarsKroghStea
Forum Mentor
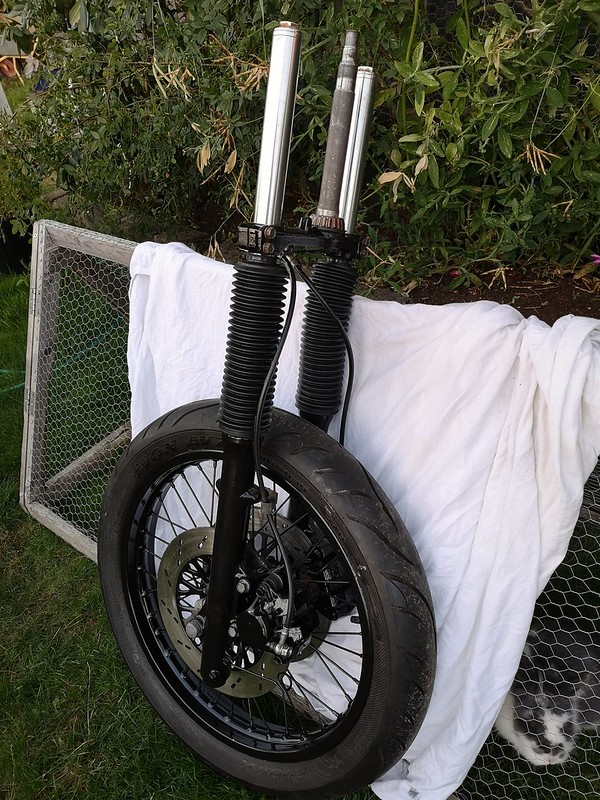 Fork 2 by Lars Krogh-Stea, on Flickr
LarsKroghStea
Forum Mentor
 L by Lars Krogh-Stea, on Flickr
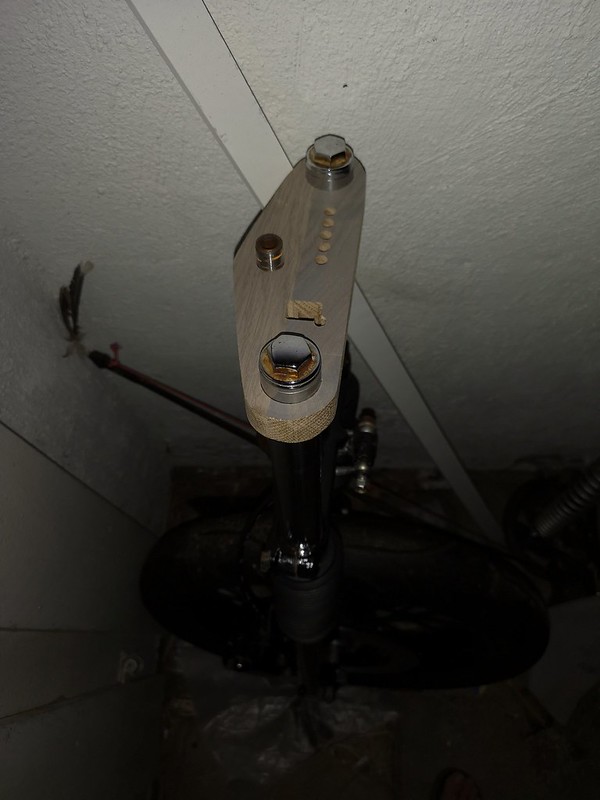 L by Lars Krogh-Stea, on Flickr
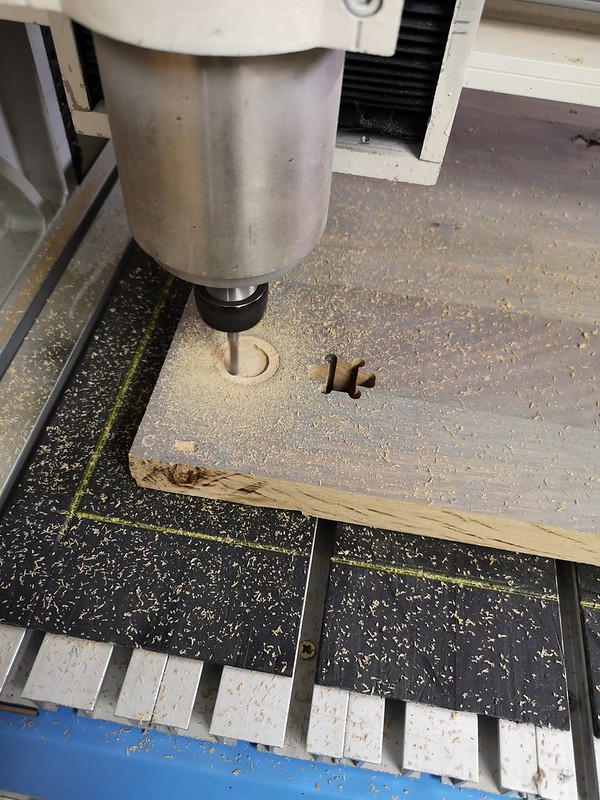
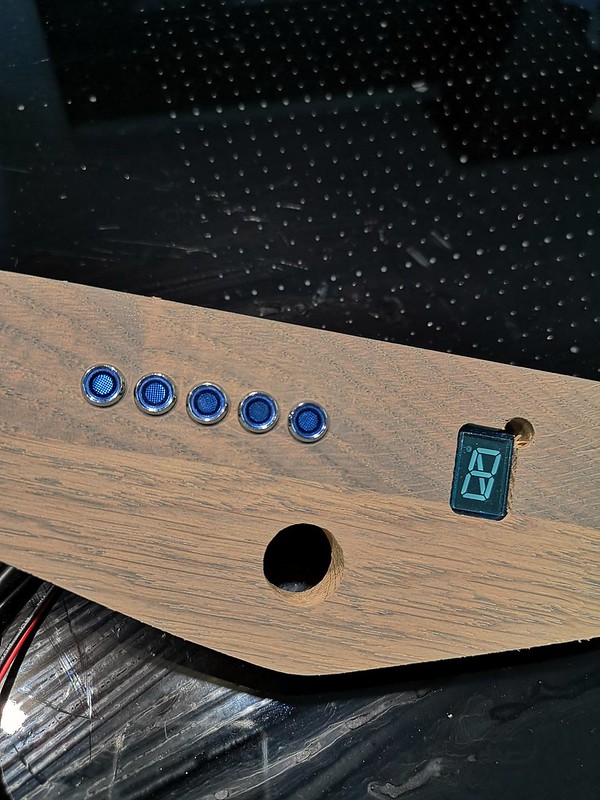
Ordered gear indicator and warning lights from ebay. The gear indicator was awesome, but the warning lights was a big disapointment
 For some reason they were all blue. Waiting for another shipment with the usual blue, green, red and orange. I will also cut down to four lights and have one common light for the indicators. The reason for the hole next to the gear-indicator is that I forgot to alter the settings before testing on the oak. The aluminum I've bought is 8mm thicker and i trilled 6mm down into my friends router table
 L by Lars Krogh-Stea, on Flickr
 L by Lars Krogh-Stea, on Flickr
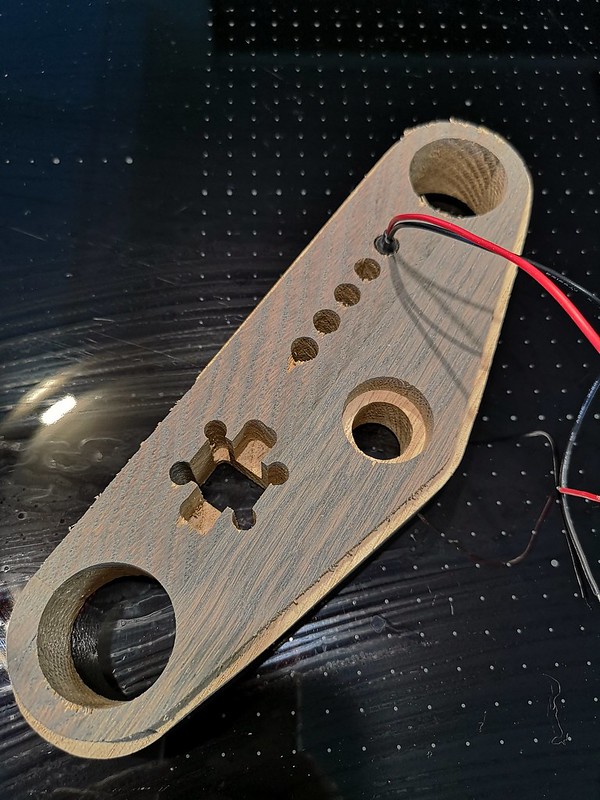
The reason for the uneven outer edges is that I went too fast and broke the end mill piece. Had to use a band saw to finish it off. It's only for testing so it doesn't really matter, and I have more end mills at home.
 L by Lars Krogh-Stea, on Flickr
 L by Lars Krogh-Stea, on Flickr
LarsKroghStea
Forum Mentor
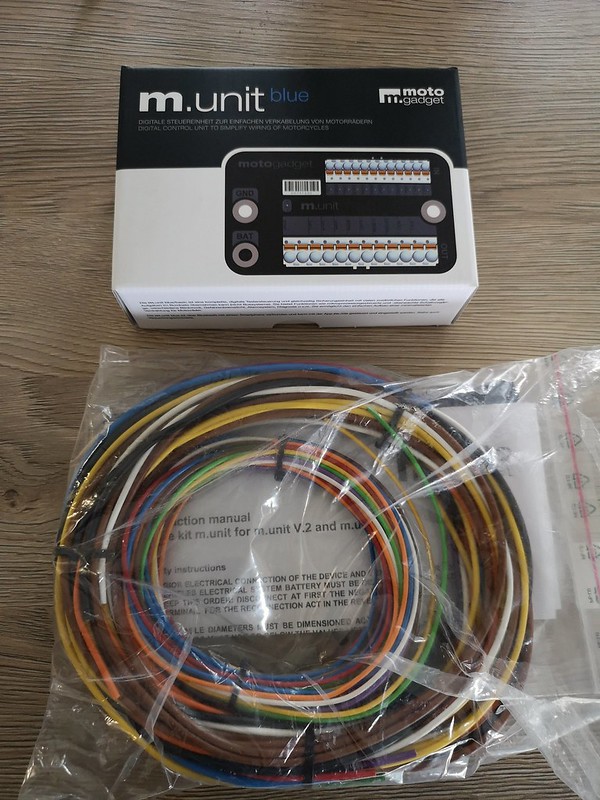 Munit by Lars Krogh-Stea, on Flickr
LarsKroghStea
Forum Mentor
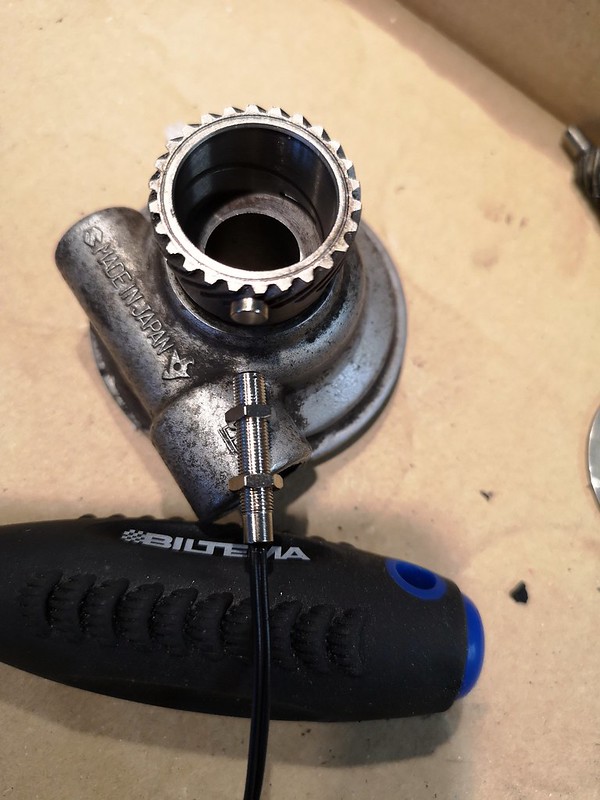 Sensor4 by Lars Krogh-Stea, on Flickr
LarsKroghStea
Forum Mentor
I sodablasted the carburettors and dusted them of afterwards with compressed air. I thought I was careful not to get any soda inside them, but my father said I should open and clean them anyway.
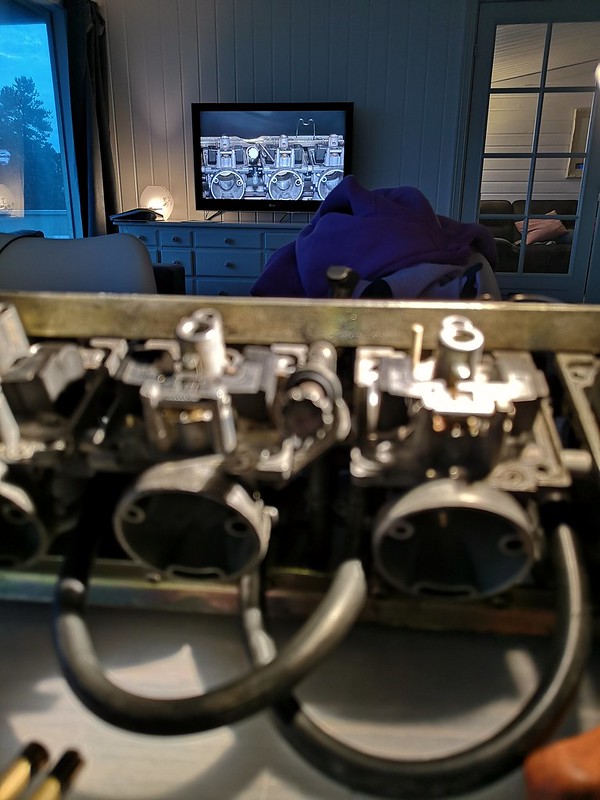 2018-09-08_08-12-08 by Lars Krogh-Stea, on Flickr
Glad I did, because he was right. Also, although I've adjusted the needles in my zx7r and knew there were diafragms in there, I didn't know the big oval channel in the inlet was directly connected. I imagine if you blow hard enough directly in there, you might rupture the diafragms. Mine where fine, but I will clean my carburettors some other way the next time.
 Soda by Lars Krogh-Stea, on Flickr
LarsKroghStea
Forum Mentor
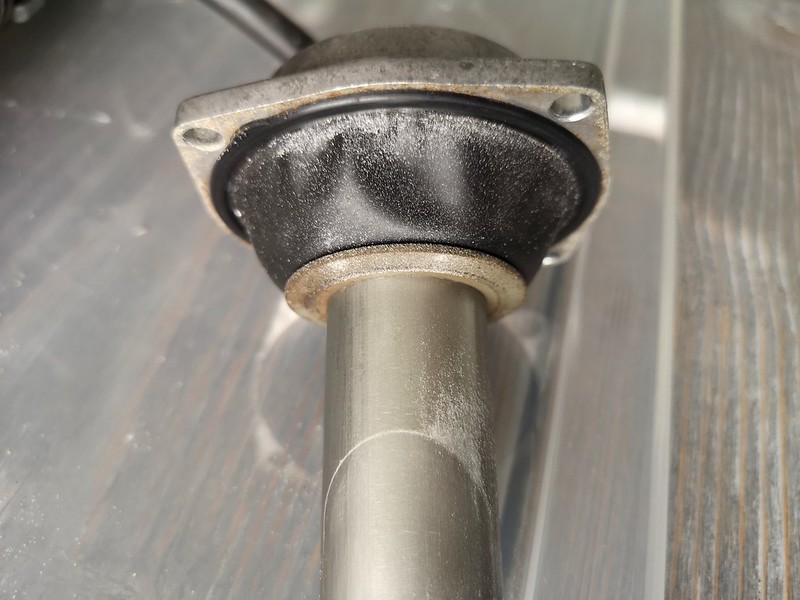
Lucky me had some stainless perforated tube laying around.
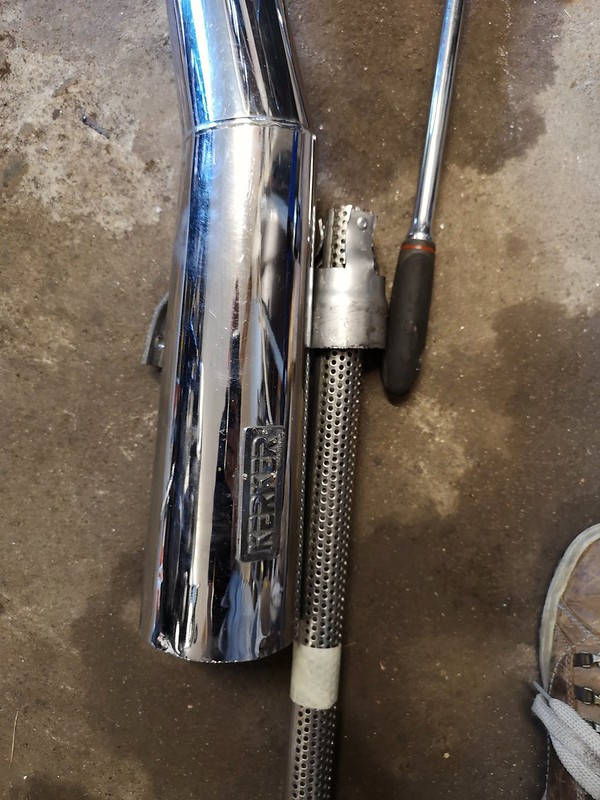 Exh 4 by Lars Krogh-Stea, on Flickr
Took some half inch aluminum to the lathe and made the end piece. It is stepped with the same thickness as in the perforated tubing. Did also put in some set screws to secure it.
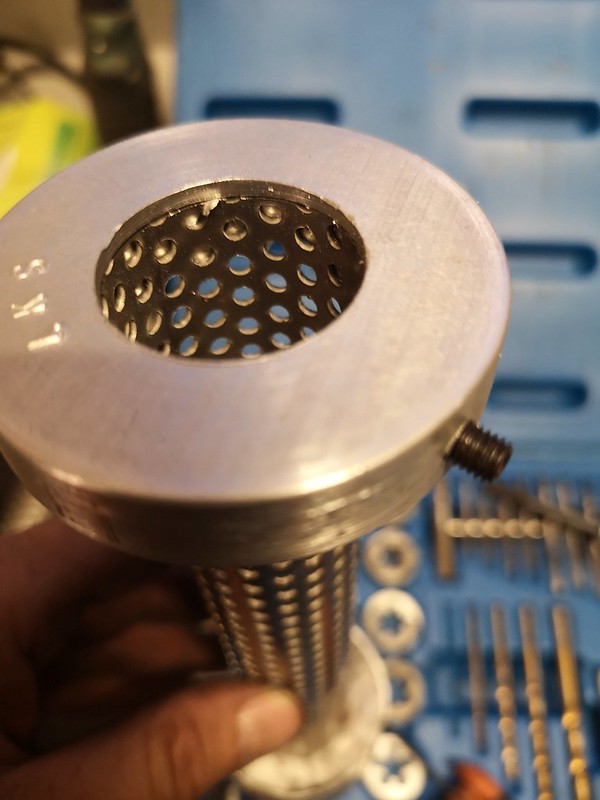 Exh 1 by Lars Krogh-Stea, on Flickr
Packed it:
 Exh 2 by Lars Krogh-Stea, on Flickr
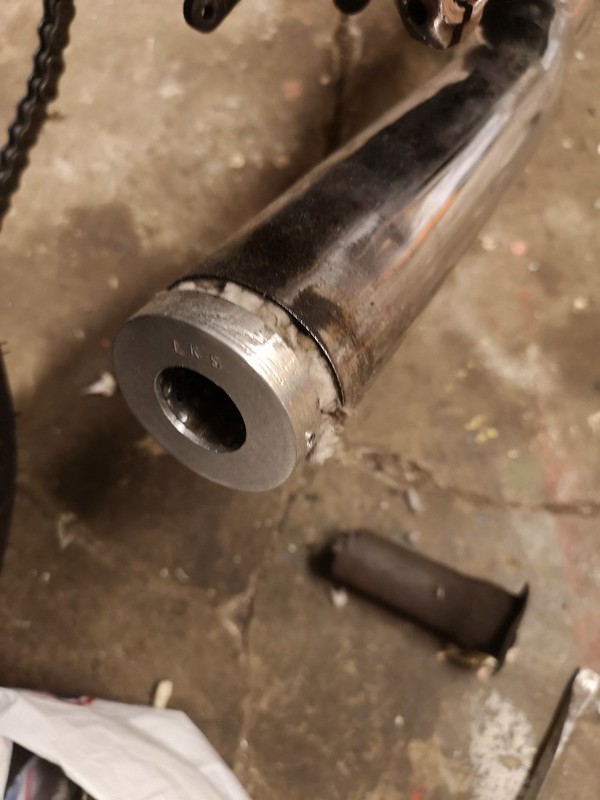
And hammered it gently in. All that is missing is a screw on the backside to keep it from moving. But I did stamp in my initials just for fun.
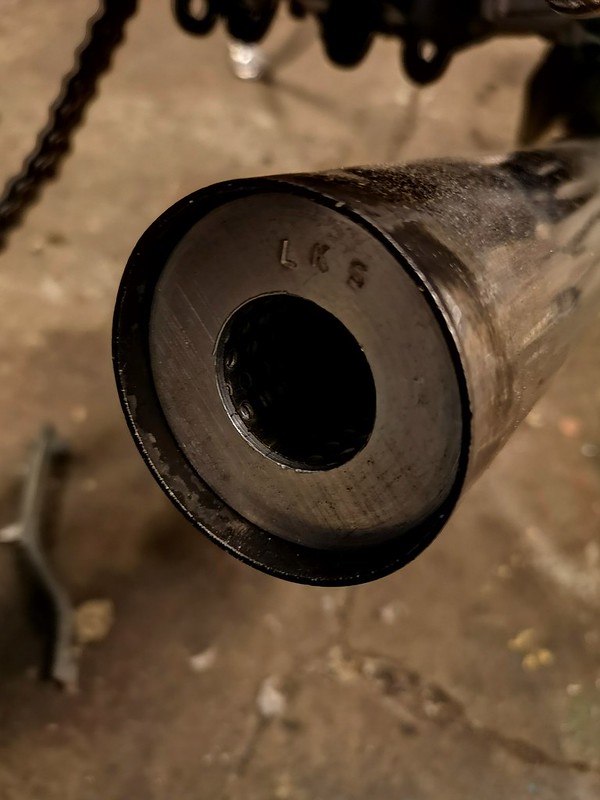 Exh 3 by Lars Krogh-Stea, on Flickr
LarsKroghStea
Forum Mentor
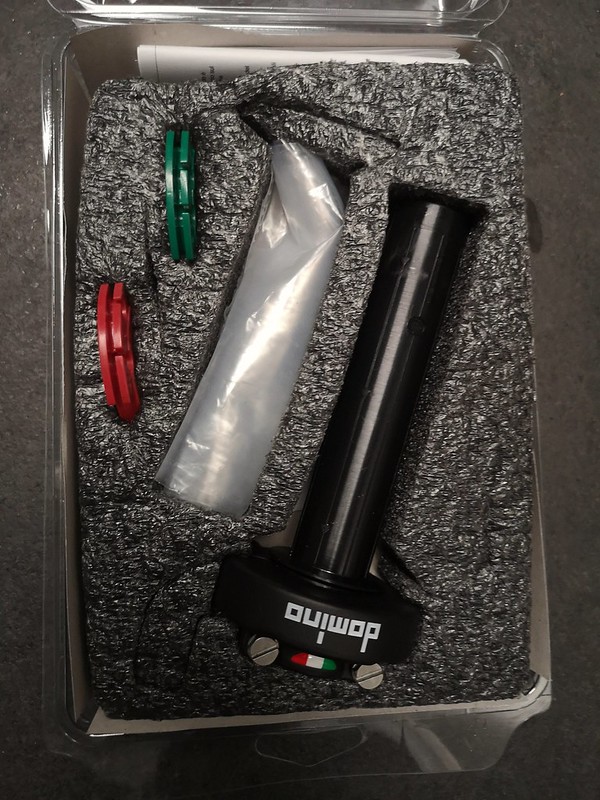 Throttle by Lars Krogh-Stea, on Flickr
LarsKroghStea
Forum Mentor
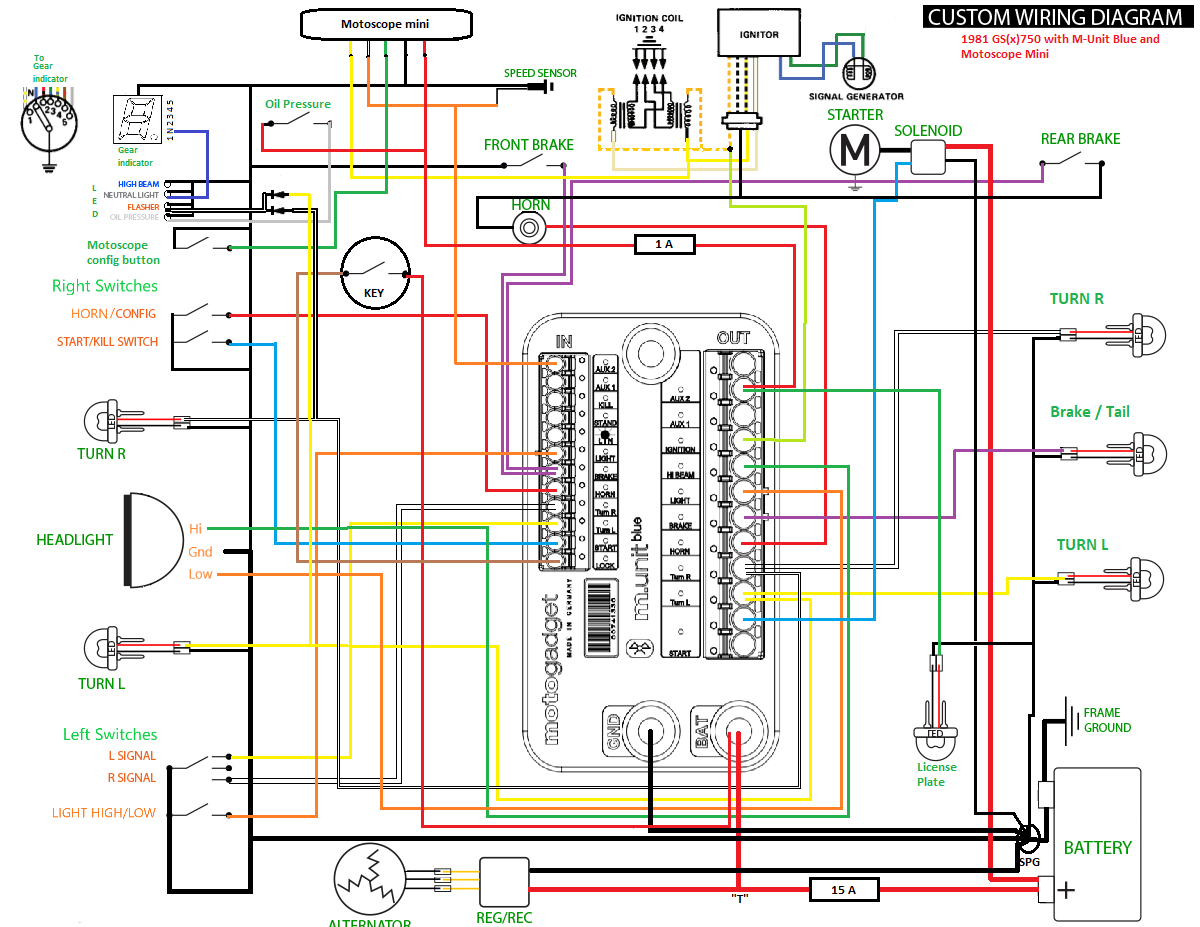
I've had a go at designing the wiring for the bike. I would be very grateful if someone would look it over and correct mistakes
I'm not sure if I should connect the regulator to battery or switced plus, so it would be helpful with a hint about that too.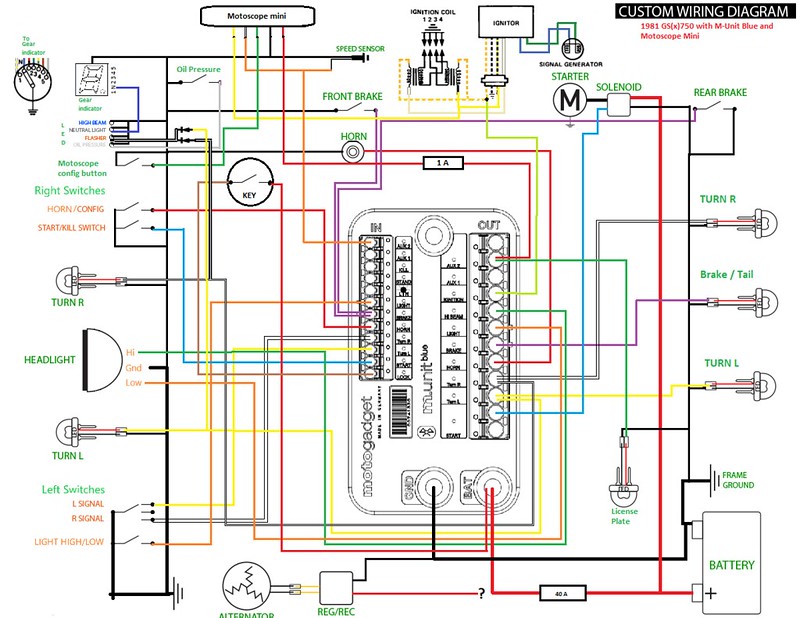 Noisemaker_koblingsskjema by Lars Krogh-Stea, on Flickr
The original wiring has a 15 amp fuse between the regulator and the battery.
It's a separate fuse as the other circuits have their own fuse.
It's mandatory as you could have a short say from a headlamp that would kill you regulator immediately.
Have you considered using the M-Lock from Motogadget?
I installed one yesterday and it works great.
BTW I believe you should also consider the diagram from a wiring harness perspective.
One for the rear of the bike, one for the front , one for the dashboard etc...
Great job!
LarsKroghStea
Forum Mentor
I've made a new diagram with the 15 amp fuse for the charging circuit and some other modifications. All ground is now leading back to the battery via wires, the oil pressure wiring is corrected and the alternator has three wires. The m-lock is really cool and i have an rfid-circuit laying that a was planning to use. Since I have the M-unit blue I'll use the bluetooth for keyless. I'll check out your builds later
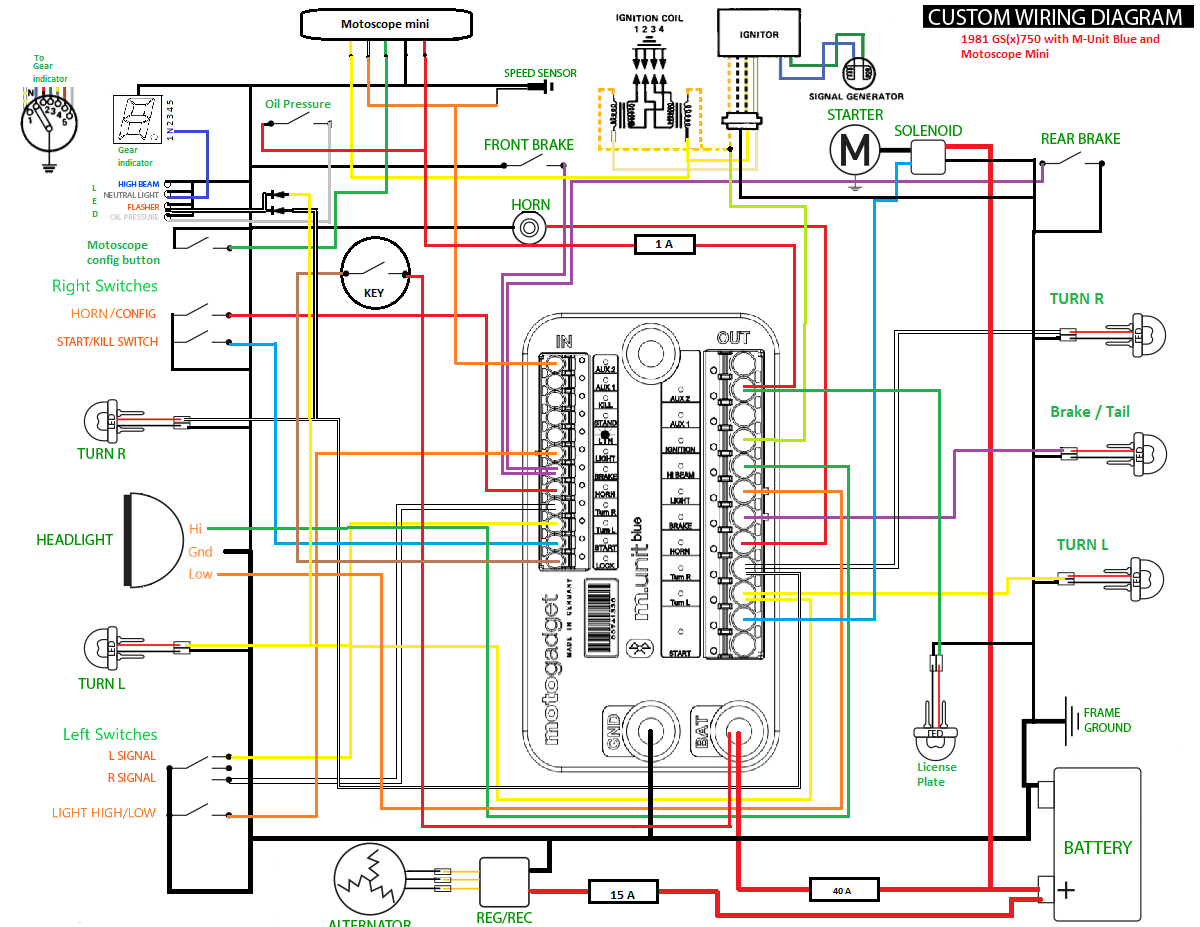 Noisemaker_koblingsskjema by Lars Krogh-Stea, on Flickr
T8erbug
Guest
LarsKroghStea
Forum Mentor
I like it so far! I think it's cool you're using your router table to prototype some of the parts. I have a Shapeoko 3 and use it from time to time on stuff like this. Let me know how that aluminum piece looks after some time in the exhaust. I've been told not to mix stainless parts with aluminum parts unless one or the other has been coated (paint or some other insulator). Galvanic corrosion occurs when the two are in direct contact. I've never seen the affect of it personally but I'm curious to see what happens after a while. Let us know if there are any signs of corrosion or if it's not a big deal!
Thanks
I didn't think about the reactivity between metals, but it makes sense. There's not much left of the driving season here, som I'm lucky if I get to test it this year.. But I will keep an eye on it and post pictures if anything interesting happens.LarsKroghStea
Forum Mentor
 Noisemaker_koblingsskjema by Lars Krogh-Stea, on Flickr