LarsKroghStea
Forum Mentor
Well, it isn't christmas without a gift from me (and sometimes my wife) to my motorcycle ") This year it was the nicest gift since the brake master/clutch. Most of the stuff I get for my bike is either pretty cheap to buy, or they're cheap because I make them myself. And to start, the bike itself was as cheap as they come. The most expensive parts so far are the m-unit and the Accossato brake master and clutch levers. Second is the Motogadget Mini and the rear wheel. The Cognito Moto front wheel that I bought this year probably costs the same as all of the others added together. It certainly cost more than the bike itself.
This year it was the nicest gift since the brake master/clutch. Most of the stuff I get for my bike is either pretty cheap to buy, or they're cheap because I make them myself. And to start, the bike itself was as cheap as they come. The most expensive parts so far are the m-unit and the Accossato brake master and clutch levers. Second is the Motogadget Mini and the rear wheel. The Cognito Moto front wheel that I bought this year probably costs the same as all of the others added together. It certainly cost more than the bike itself.
On the other hand, insurance for the GS750 is next to nothing and compared to the insurance on the Kawasaki Zx7-R I drove when I got my license, the Cognito Moto wheel costs about two years worth of insurance. Better to give the money to myself") Just realised that what you have been witnessing in the last few sentences is me justifying to myself the process of bying a ridiculously expensive part for my bike
Just realised that what you have been witnessing in the last few sentences is me justifying to myself the process of bying a ridiculously expensive part for my bike 
Anyway..I've been looking for cheaper ways to convert to GSXR front fork with spoked wheel. There are other companies that make conversion hubs for motorcycles and most are even more expensive than Cognito Moto. Most of the time they are also far from being as complete a package. I thought of milling one myself, but there's not much room for errors and as T8erbug (thegsresources) said, aluminum blocks that size are so expensive that it doesn't make sense when you factor in errors and do-overs. Another option was a Harley front wheel or buying just the hub from CM and sourcing the other parts myself. I know Harley wheel is only 1mm or so narrower. Used Harley parts aren't as cheap in Norway as they are in the US. Adding to this is the price of special spokes. The cost of other options vary wildly, but the CM spokes are really high quality and looks great.
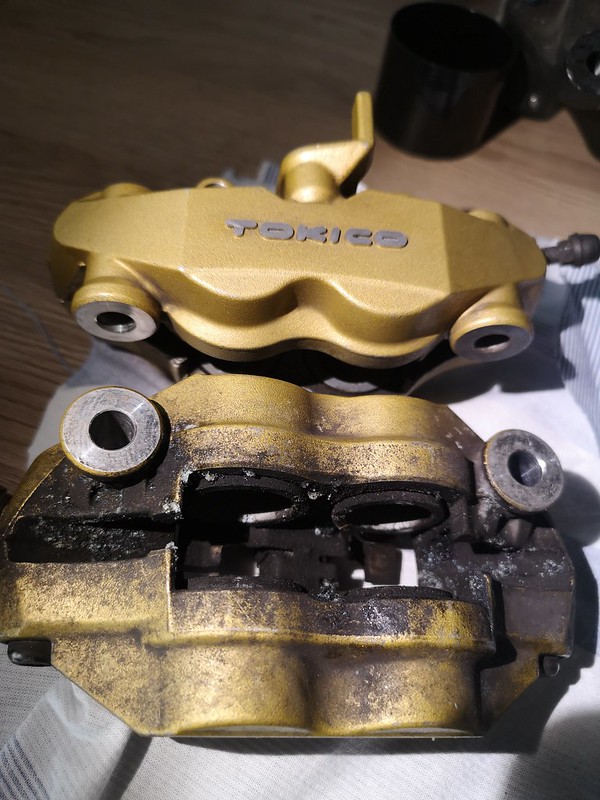
The last option was to make new front axle to convert my original front wheel. This would be a good option if I didn't want to use a radial fork. The radially mounted calipers sits closer together than older brake setups. On the original GS fork there's already little room between the calipers (depending on wheel size, some use GS1000 calipers with the tapered back to get the wheel to fit).
Long story short; I could probably, with a substantial amount of work/time spent making contacts/sourcing parts/money spent on parts that I didn't need/money spent on materials for adapters and so on, make a front conversion wheel for something between 50 to 75% of the price of the CM wheel.
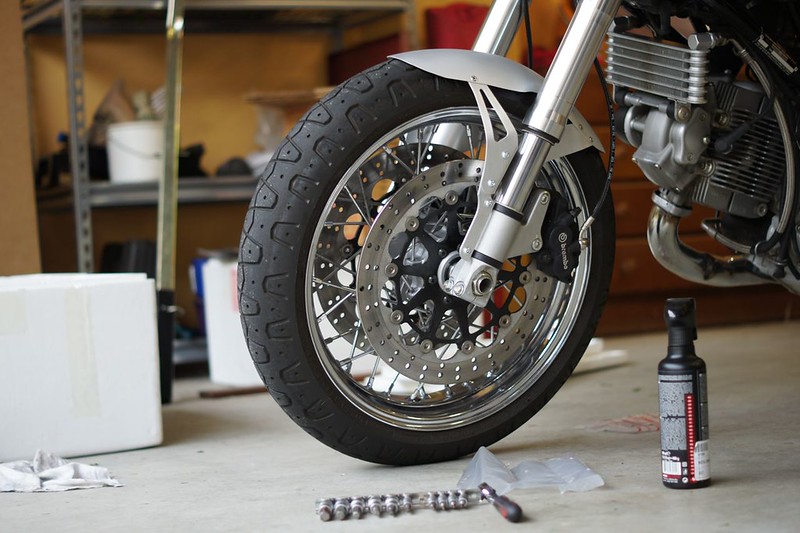
The way the situation is now, that time is better used working overtime at my regular job and using the extra money to buy a preassembled CM wheel. It's certainly a satisfying feeling to have made something like this (I've alredy made the rear wheel from parts ). On the other hand, you can't take away the feeling when you unpack such an awesome product as the CM wheel.
Conclusion/TLDR: You can not go wrong with buying the Cognito Moto front wheel. The quality is awesome and if you factor in your own hourly rate, I don't think you can make it cheaper (unless you are a professional).
This year it was the nicest gift since the brake master/clutch. Most of the stuff I get for my bike is either pretty cheap to buy, or they're cheap because I make them myself. And to start, the bike itself was as cheap as they come. The most expensive parts so far are the m-unit and the Accossato brake master and clutch levers. Second is the Motogadget Mini and the rear wheel. The Cognito Moto front wheel that I bought this year probably costs the same as all of the others added together. It certainly cost more than the bike itself. On the other hand, insurance for the GS750 is next to nothing and compared to the insurance on the Kawasaki Zx7-R I drove when I got my license, the Cognito Moto wheel costs about two years worth of insurance. Better to give the money to myself
Just realised that what you have been witnessing in the last few sentences is me justifying to myself the process of bying a ridiculously expensive part for my bike Anyway..I've been looking for cheaper ways to convert to GSXR front fork with spoked wheel. There are other companies that make conversion hubs for motorcycles and most are even more expensive than Cognito Moto. Most of the time they are also far from being as complete a package. I thought of milling one myself, but there's not much room for errors and as T8erbug (thegsresources) said, aluminum blocks that size are so expensive that it doesn't make sense when you factor in errors and do-overs. Another option was a Harley front wheel or buying just the hub from CM and sourcing the other parts myself. I know Harley wheel is only 1mm or so narrower. Used Harley parts aren't as cheap in Norway as they are in the US. Adding to this is the price of special spokes. The cost of other options vary wildly, but the CM spokes are really high quality and looks great.
The last option was to make new front axle to convert my original front wheel. This would be a good option if I didn't want to use a radial fork. The radially mounted calipers sits closer together than older brake setups. On the original GS fork there's already little room between the calipers (depending on wheel size, some use GS1000 calipers with the tapered back to get the wheel to fit).
Long story short; I could probably, with a substantial amount of work/time spent making contacts/sourcing parts/money spent on parts that I didn't need/money spent on materials for adapters and so on, make a front conversion wheel for something between 50 to 75% of the price of the CM wheel.
The way the situation is now, that time is better used working overtime at my regular job and using the extra money to buy a preassembled CM wheel. It's certainly a satisfying feeling to have made something like this (I've alredy made the rear wheel from parts
). On the other hand, you can't take away the feeling when you unpack such an awesome product as the CM wheel.Conclusion/TLDR: You can not go wrong with buying the Cognito Moto front wheel. The quality is awesome and if you factor in your own hourly rate, I don't think you can make it cheaper (unless you are a professional).