G
Guest
Guest
Got some pic's? If they're 80 - 82 450 carbs I'll recognise them straight away ")
But good score either way!
But good score either way!
Required reading for all forum users!!!
Welcome!
Register to access the full functionality of the GSResources forum. Until you register and activate your account you will not have full forum access, nor will you be able to post or reply to messages.
A note to new registrants...
All new forum registrations must be activated via email before you have full access to the forum.
A Special Note about Email accounts!
DO NOT SIGN UP USING hotmail, outlook, gmx, sbcglobal, att, bellsouth or email.com. They delete our forum signup emails.
A note to old forum members...
I receive numerous requests from people who can no longer log in because their accounts were deleted. As mentioned in the forum FAQ, user accounts are deleted if you haven't logged in for the past 6 months. If you can't log in, then create a new forum account. If you don't get an error message, then check your email account for an activation message. If you get a message stating that the email address is already in use, then your account still exists so follow the instructions in the forum FAQ for resetting your password.
Have you forgotten your password or have a new email address? Then read the forum FAQ for details on how to reset it.
Any email requests for "can't log in anymore" problems or "lost my password" problems will be deleted. Read the forum FAQ and follow the instructions there - that's what we have one for...
If you are a returning visitor who never received your confirmation email, then odds are your email provider is blockinig emails from our server. The only thing that can be done to get around this is you will have to try creating another forum account using an email address from another domain.
If you are a returning visitor to the forum and can't log in using your old forum name and password but used to be able to then chances are your account is deleted. Purges of the databases are done regularly. You will have to create a new forum account and you should be all set.

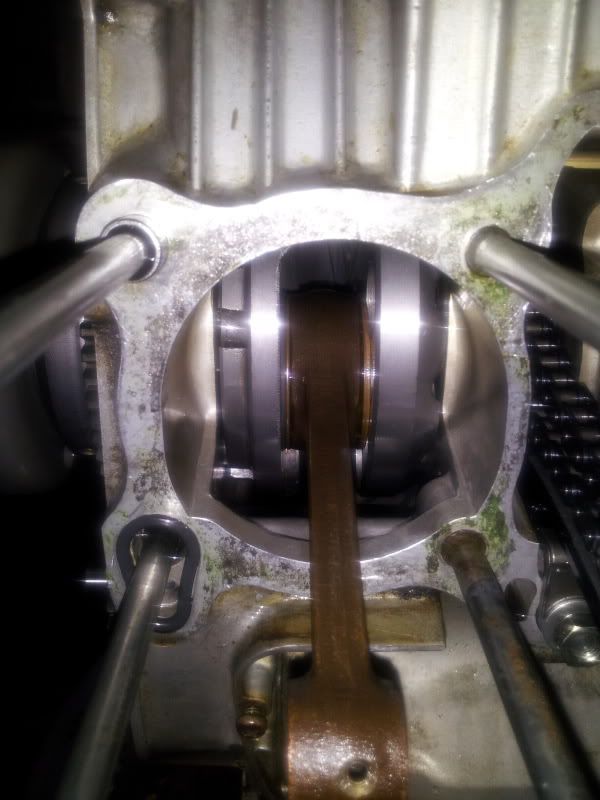
I'm willing to bet if I can swap in the correct bowl, the rattling problem might disappear. Obviously the side with the wrong bowl isn't getting enough fuel and is causing an extreme lean condition. I try getting a video with lower idle.
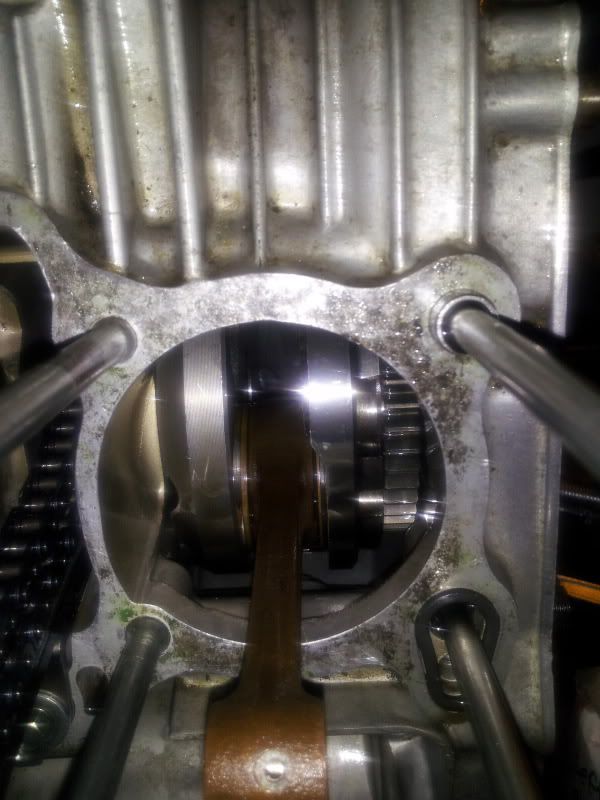
Sounds like the chain slapping around against the guide at the last bit.
Yes it could be.
I have seen this on my bike.
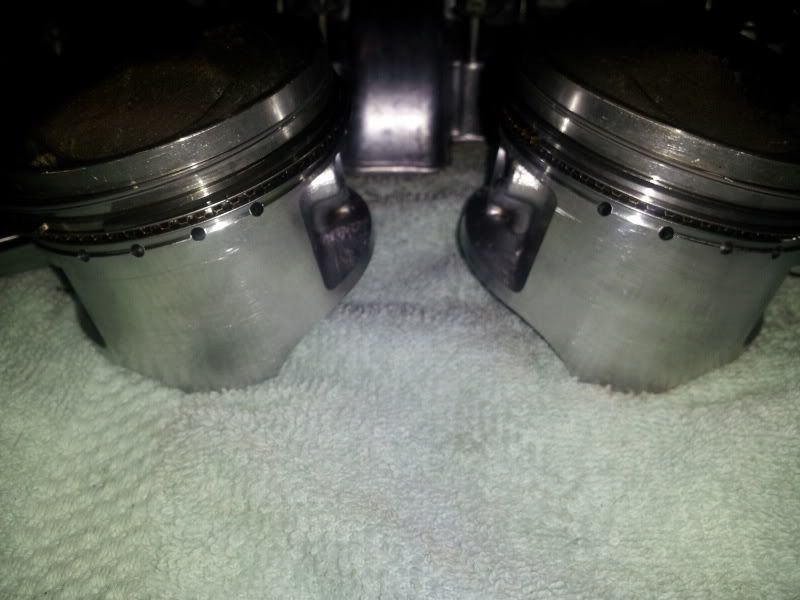
I fixed it by swapping piston's from left to right.
Try pulling the cam cover off and see if you have any cam walk.
Check valve clearance to see if its too tight now that its been running,
What effect does pulling the plug off on that side or the other have on the noise?
What did you have for piston to wall clearance?
I went back and reread the build.
You only had one piston while waiting for the other one.
did you have both cylinders bored for that one piston?
If so, do you remember which side that one is on.
My theory is that: the piston they bored the cylinders for was good in either side and right now its on the right side. The other piston that cam later has a slightly smaller size and the tolerance is too high.


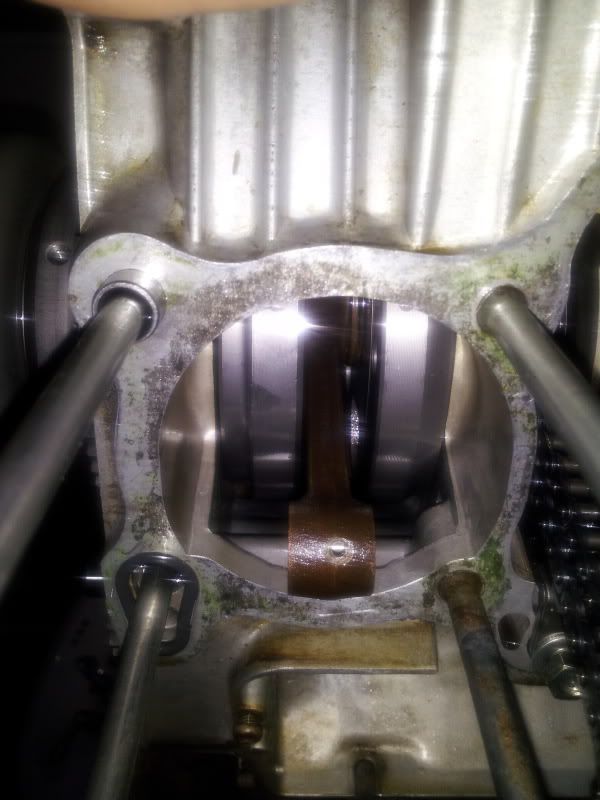
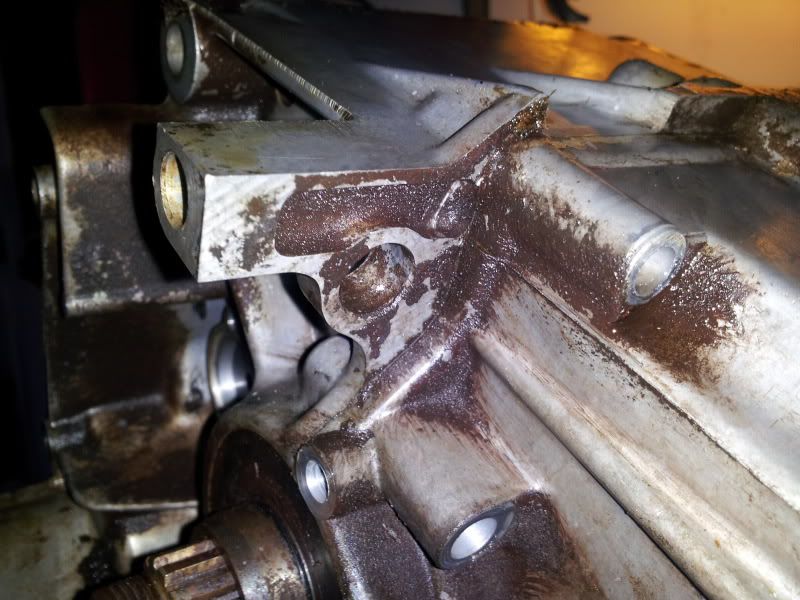
If you look at the front and back of the engine you can see a notch cut into the one part of the case and a hole in the other half of the case. You could use a bolt and nut to push the cases apart.
Those are the spots for the actual spreader tool.
There is one in your first picture just under the mount hole beside where the timing chain is flopped over.


I don't really understand how you would do this. Are these the holes you're talking about?