I bet it'll just need the valve clearances checking, carbs cleaning, oil and filter and new plugs, new tyres, fuel tap and hoses, brake refurb, electrics sorting.....only one way to find out!
-
Required reading for all forum users!!!
Welcome!
Register to access the full functionality of the GSResources forum. Until you register and activate your account you will not have full forum access, nor will you be able to post or reply to messages.A note to new registrants...
All new forum registrations must be activated via email before you have full access to the forum.A Special Note about Email accounts!
DO NOT SIGN UP USING hotmail, outlook, gmx, sbcglobal, att, bellsouth or email.com. They delete our forum signup emails.A note to old forum members...
I receive numerous requests from people who can no longer log in because their accounts were deleted. As mentioned in the forum FAQ, user accounts are deleted if you haven't logged in for the past 6 months. If you can't log in, then create a new forum account. If you don't get an error message, then check your email account for an activation message. If you get a message stating that the email address is already in use, then your account still exists so follow the instructions in the forum FAQ for resetting your password.Have you forgotten your password or have a new email address? Then read the forum FAQ for details on how to reset it.
Any email requests for "can't log in anymore" problems or "lost my password" problems will be deleted. Read the forum FAQ and follow the instructions there - that's what we have one for...
-
Returning Visitors
If you are a returning visitor who never received your confirmation email, then odds are your email provider is blockinig emails from our server. The only thing that can be done to get around this is you will have to try creating another forum account using an email address from another domain.
If you are a returning visitor to the forum and can't log in using your old forum name and password but used to be able to then chances are your account is deleted. Purges of the databases are done regularly. You will have to create a new forum account and you should be all set.
You are using an out of date browser. It may not display this or other websites correctly.
You should upgrade or use an alternative browser.
You should upgrade or use an alternative browser.
New GS1100 G Restoration Project. Rebuilding my Dad's bike
- Thread starter londonboards
- Start date
S
SVSooke
Guest
I picked up a 81 650E for very few $$ years ago because it was running on 3 cylinders,it need a petcock.Got my 85 750EF for very few $$ because it wouldn't start,it needed a petcock.See a connection?
SVSooke - I can use the one from my other bike to test it. Thanks for that tip.
Greetings
Greetings
P
Paul
Guest
I'd have given you the same money for it for I was going to buy another, I think you did ok! And as already said valves, tyres etc... it should be OK.... and once it's ridden for a year and has some history you could sell it with tax and text for ?1300+ I thinkAgemax - hhhmmm. Tell me more. Actually, if it's really bad news I'm not sure I want to know now the deal is done. If it really is a bummer, I can re-list it in few weeks. I would not expect to lose much on it.
Oh go on tell me the bad news.
Greetings
A
althomas101
Guest
I picked up a 81 650E for very few $$ years ago because it was running on 3 cylinders,it need a petcock.Got my 85 750EF for very few $$ because it wouldn't start,it needed a petcock.See a connection?
Yea I got my GS1000 super cheap because it only ran on 2 cylinders, one from clogged pilot jet, and the other from a bad petcock. Also it smoked from the rings sticking, the guy though the engine was shot.
Installing Head Races and Swing Arm Bearings
Installing Head Races and Swing Arm Bearings
The rebuild has begun. The tables have turned. I have been distracted of late because I bought another GS1100G and I have been getting that one road ready so that I can start riding again. (See: GS1100G - Road Runner Thread). But here we go. Head races are going in. I did not have much luck on my own (first one started going in sideways) so I went to get some expert help from a guy with a lot of experience and lots of tools.
See: My GS1100G Blog - Installing Head Races
First clean up the inner surfaces:

Then use a 10 ton press.

Then onto the swing arm. We used to other half as a bolster.
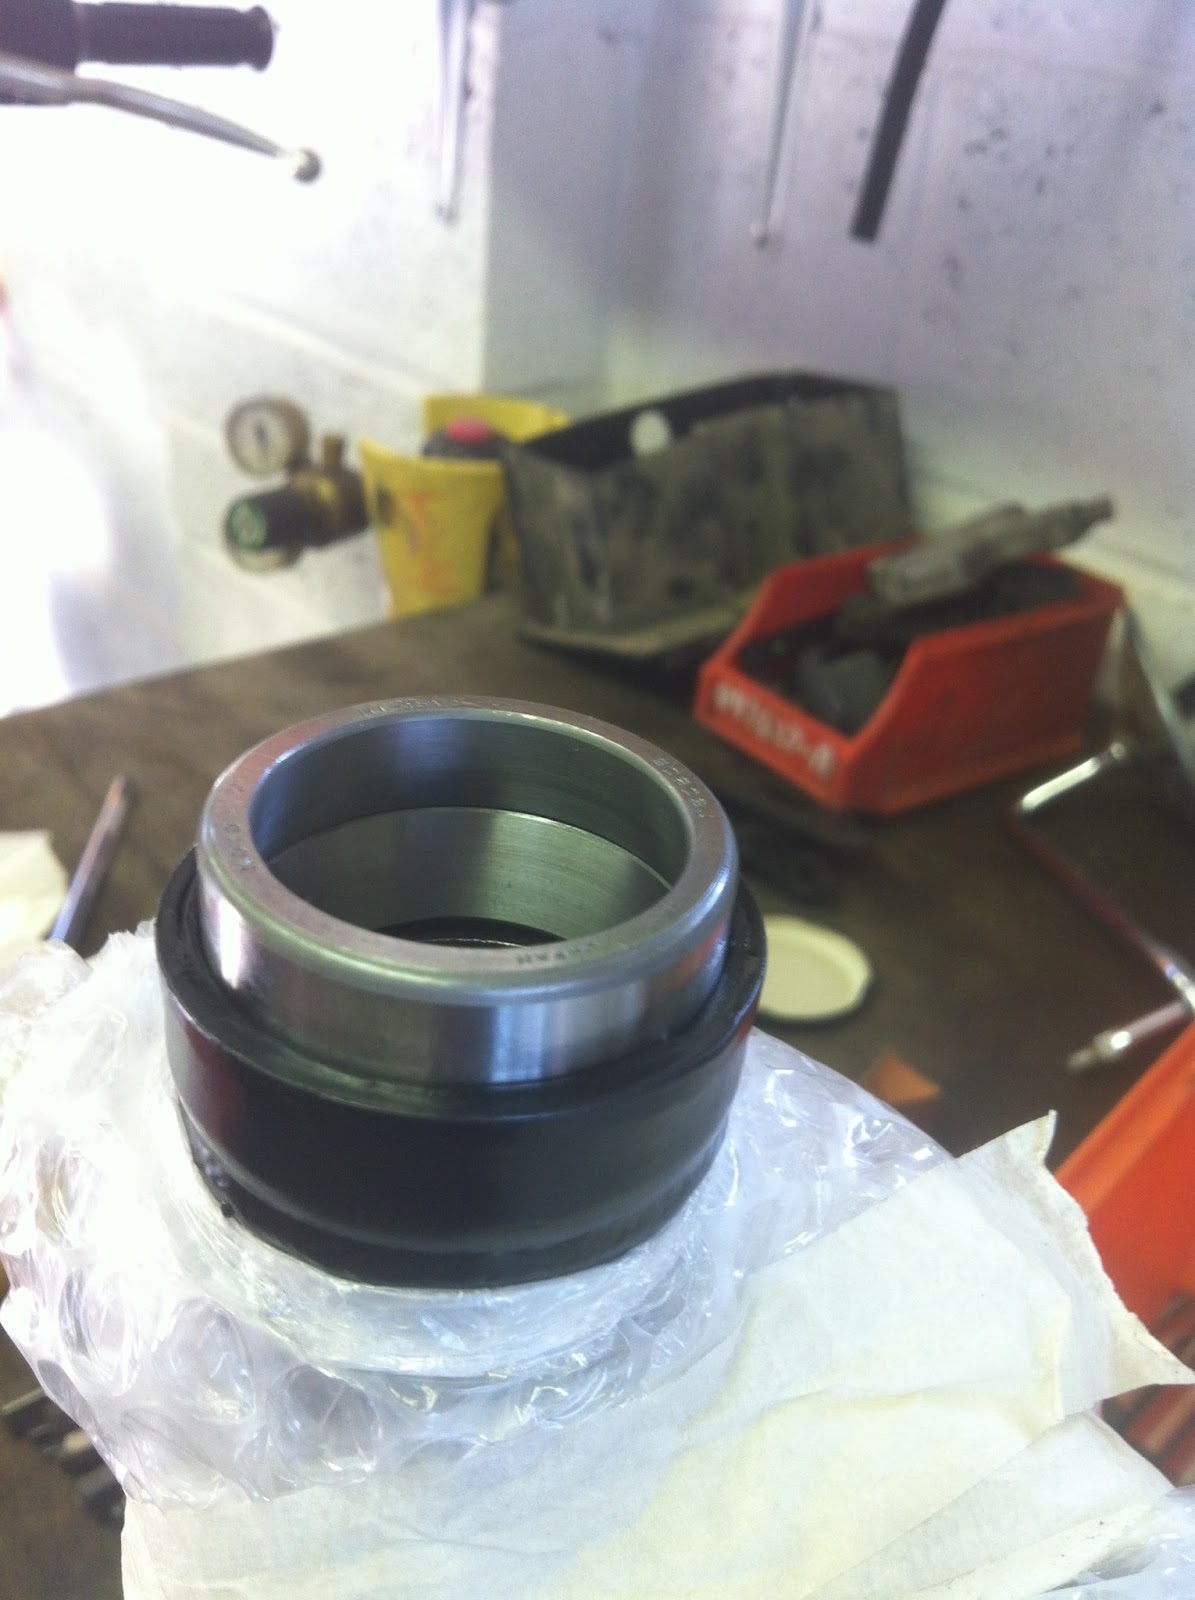
In you go:

The rebuild has started!
Greetings
Installing Head Races and Swing Arm Bearings
The rebuild has begun. The tables have turned. I have been distracted of late because I bought another GS1100G and I have been getting that one road ready so that I can start riding again. (See: GS1100G - Road Runner Thread). But here we go. Head races are going in. I did not have much luck on my own (first one started going in sideways) so I went to get some expert help from a guy with a lot of experience and lots of tools.
See: My GS1100G Blog - Installing Head Races
First clean up the inner surfaces:
Then use a 10 ton press.
Then onto the swing arm. We used to other half as a bolster.
In you go:
The rebuild has started!
Greetings
I dont know what step you are on now.I hope you dont stop posting.I would have given up long ago if i had started with the mess you had.But it was your dad's which makes it more important.great job.I know now you can fully know how crappy japanese screws and bolts were.
Ron - Don't worry I am still much involved in the project. I just got a little diverted by wanting to do some riding so I bought another GS1100G to get on the road. See: My Road Runner Project Thread.
Greetings
Greetings
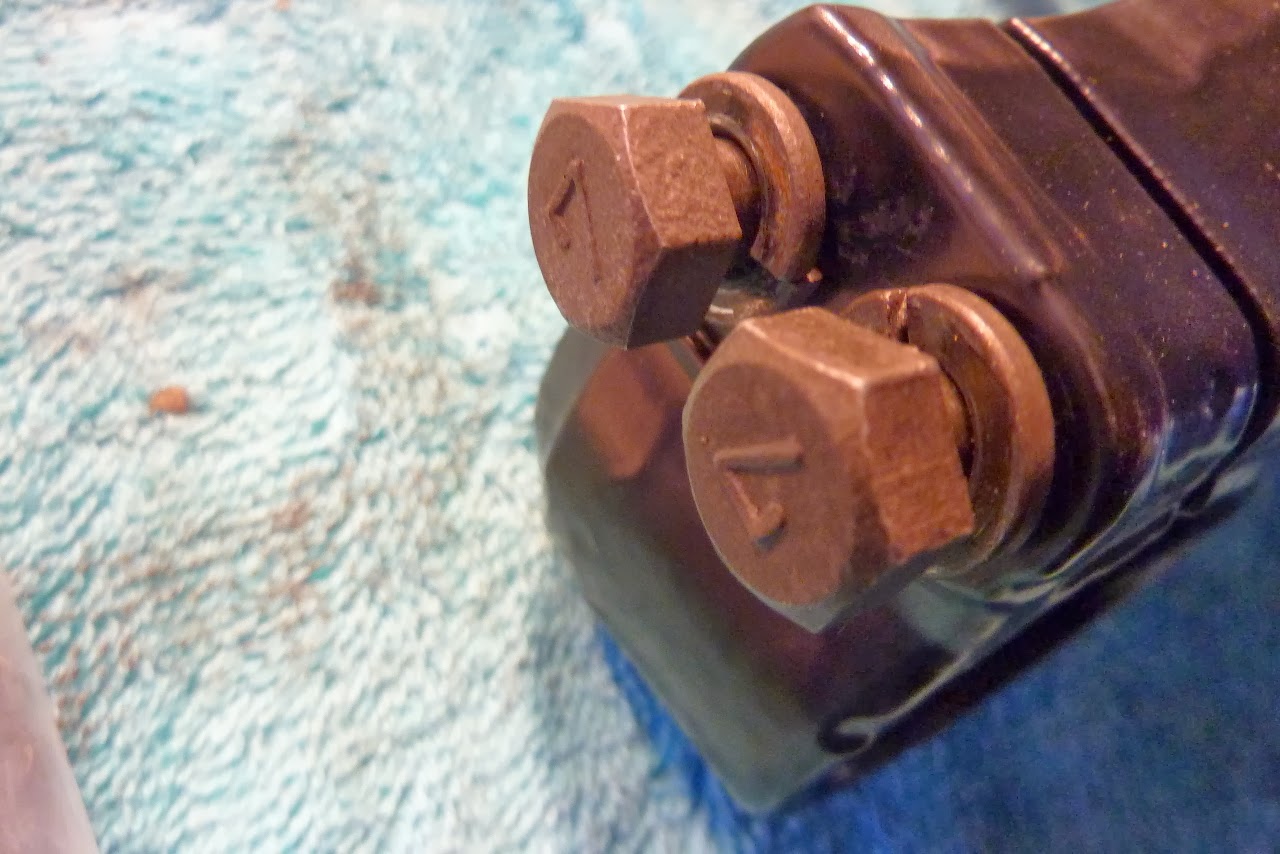
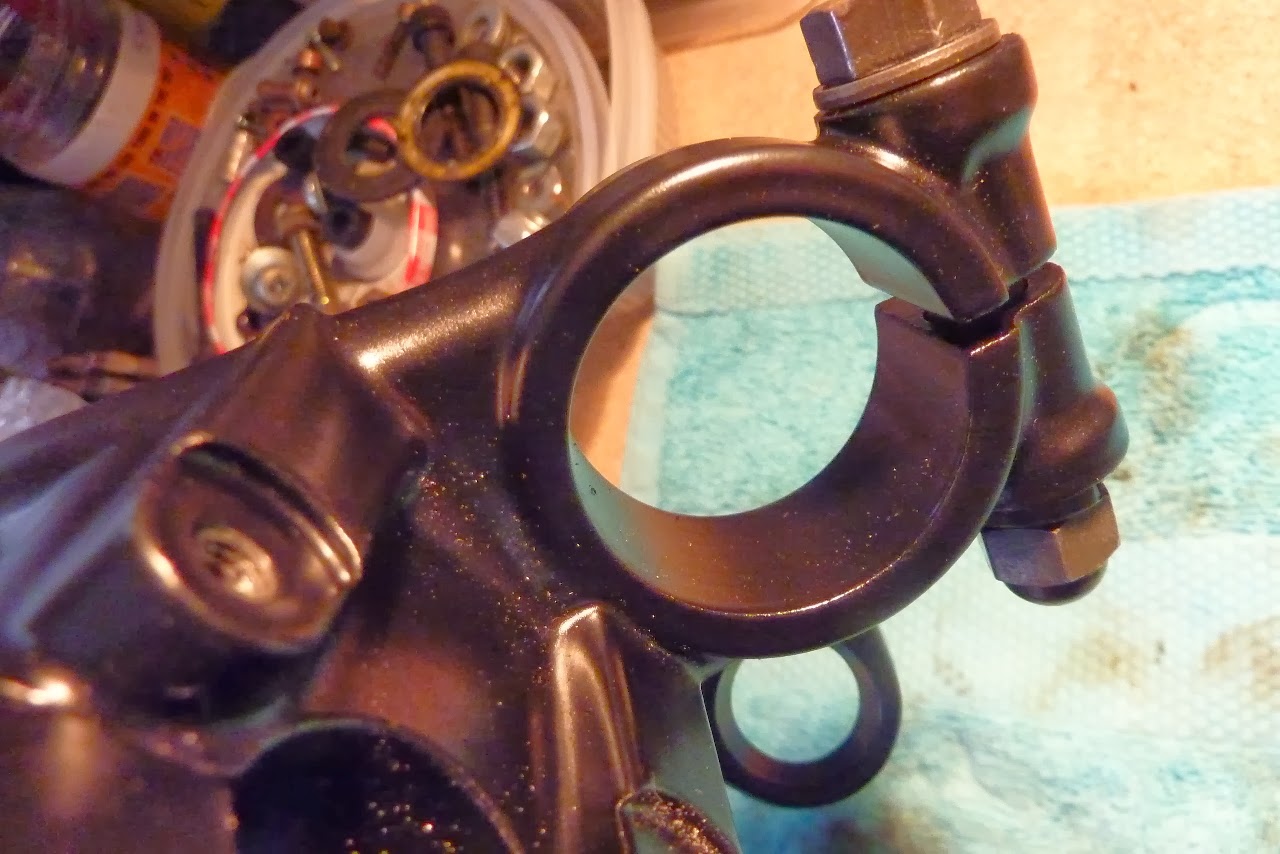
Day 511 - Preparing Streering Head for Reassembly
Day 511 - Preparing Streering Head for Reassembly
It has been some months since my last post. But I have finally started back into the restoration of this fabulous bike.
I have spent quite a bit of time over the last 3 months getting my other GS1100G on the road so that I at least had a Road Runner bike to drive whilst this one was being restored. I estimate that I still need another 18 months at least to finish this bike and that was too long to go without having a bike on the road. See My Suzuki GS1100G Road Runner thread and My Suzuki GS1100G Road Runner Blog. So I now have 2 of these beasts.
I still have to do a clean up of the engine, probably with a top end overhaul, a repaint of the engine and a wiring harness overhaul. But in order that I can see some progress, I am going to put some stuff back on the frame.
So the next job was to prepare the steering head parts for reassembly. See My GS1100G Blog - Preparing Steering Head.
The steering head parts have been lovingly powder coated:


I needed to remove the masking tape and tap out the holes where the paint had got in and polish up the bolts:


and I need to find a way to get this bearing seated. But first I need to find the washer that is supposed to be underneath it:

Greetings
Day 511 - Preparing Streering Head for Reassembly
It has been some months since my last post. But I have finally started back into the restoration of this fabulous bike.
I have spent quite a bit of time over the last 3 months getting my other GS1100G on the road so that I at least had a Road Runner bike to drive whilst this one was being restored. I estimate that I still need another 18 months at least to finish this bike and that was too long to go without having a bike on the road. See My Suzuki GS1100G Road Runner thread and My Suzuki GS1100G Road Runner Blog. So I now have 2 of these beasts.
I still have to do a clean up of the engine, probably with a top end overhaul, a repaint of the engine and a wiring harness overhaul. But in order that I can see some progress, I am going to put some stuff back on the frame.
So the next job was to prepare the steering head parts for reassembly. See My GS1100G Blog - Preparing Steering Head.
The steering head parts have been lovingly powder coated:
I needed to remove the masking tape and tap out the holes where the paint had got in and polish up the bolts:
and I need to find a way to get this bearing seated. But first I need to find the washer that is supposed to be underneath it:
Greetings
Last edited:
You might need to clean the paint from the yokes where the fork tubes fit, I believe you have some nicely redone ones? Test fit them, I suspect they will be tight.
If you knew someone with a press you could shove that bearing down using a long tube, give it a smear of grease or oil to help it slip down. If you decide to pound it down using a tube and hammer remember you might spoil the powder coat on the underside of the yoke.
If you knew someone with a press you could shove that bearing down using a long tube, give it a smear of grease or oil to help it slip down. If you decide to pound it down using a tube and hammer remember you might spoil the powder coat on the underside of the yoke.
tatu - thanks for that. Yes, of course the powder coat will be inside the yokes. I will test fit them. Yes I have some lovely tubes to fit in!
Yes, pounding that bearing down does risk knocking the powder coat on the other side. I read somewhere that putting the thing in the freezer for a couple of days helps. I might just leave it until I have access to a press!
Yes, pounding that bearing down does risk knocking the powder coat on the other side. I read somewhere that putting the thing in the freezer for a couple of days helps. I might just leave it until I have access to a press!
S
SVSooke
Guest
tatu - thanks for that. Yes, of course the powder coat will be inside the yokes. I will test fit them. Yes I have some lovely tubes to fit in!
Yes, pounding that bearing down does risk knocking the powder coat on the other side. I read somewhere that putting the thing in the freezer for a couple of days helps. I might just leave it until I have access to a press!

Used this to do the lower triple bearing on my 78 1000,couldn't get a piece of 1 1/4 pipe the right length.For that one it was 10 1/2 ".I put my triple in the deep freezer for about an hour or so and gently warmed the bearing on the oven,IIRC about 200 degrees.Still had to tap it down.If you can use the press it would be easy.
The oven (but not too hot) and the freezer trick works pretty well.
If you have to whack the bearing down rest the bottom on an old pillow or thick bit of sponge; it'll need a few more taps but you won't damage the PC.
And don't forget the grease.
If you have to whack the bearing down rest the bottom on an old pillow or thick bit of sponge; it'll need a few more taps but you won't damage the PC.
And don't forget the grease.
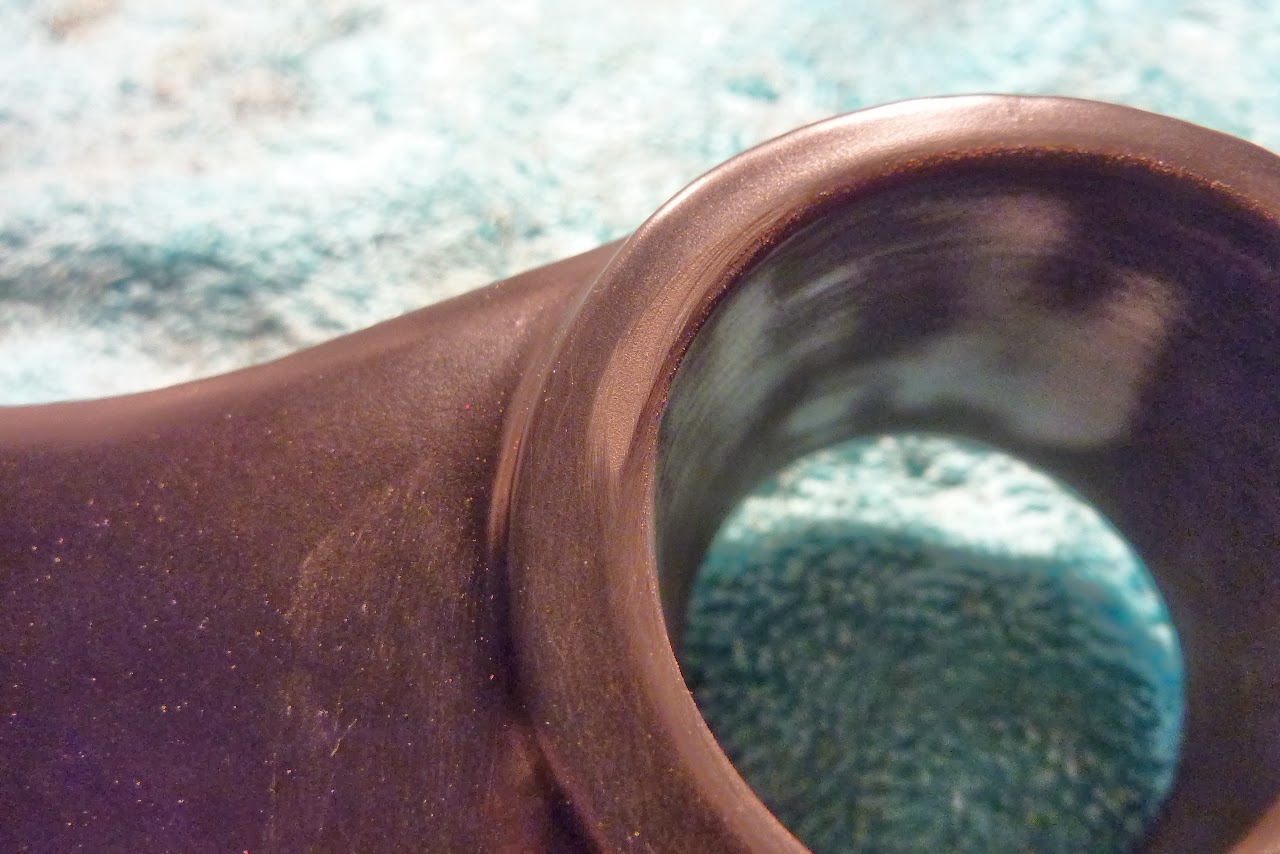
How right you are. They are beautifully painted inside. Seems a shame to scrape the paint off:

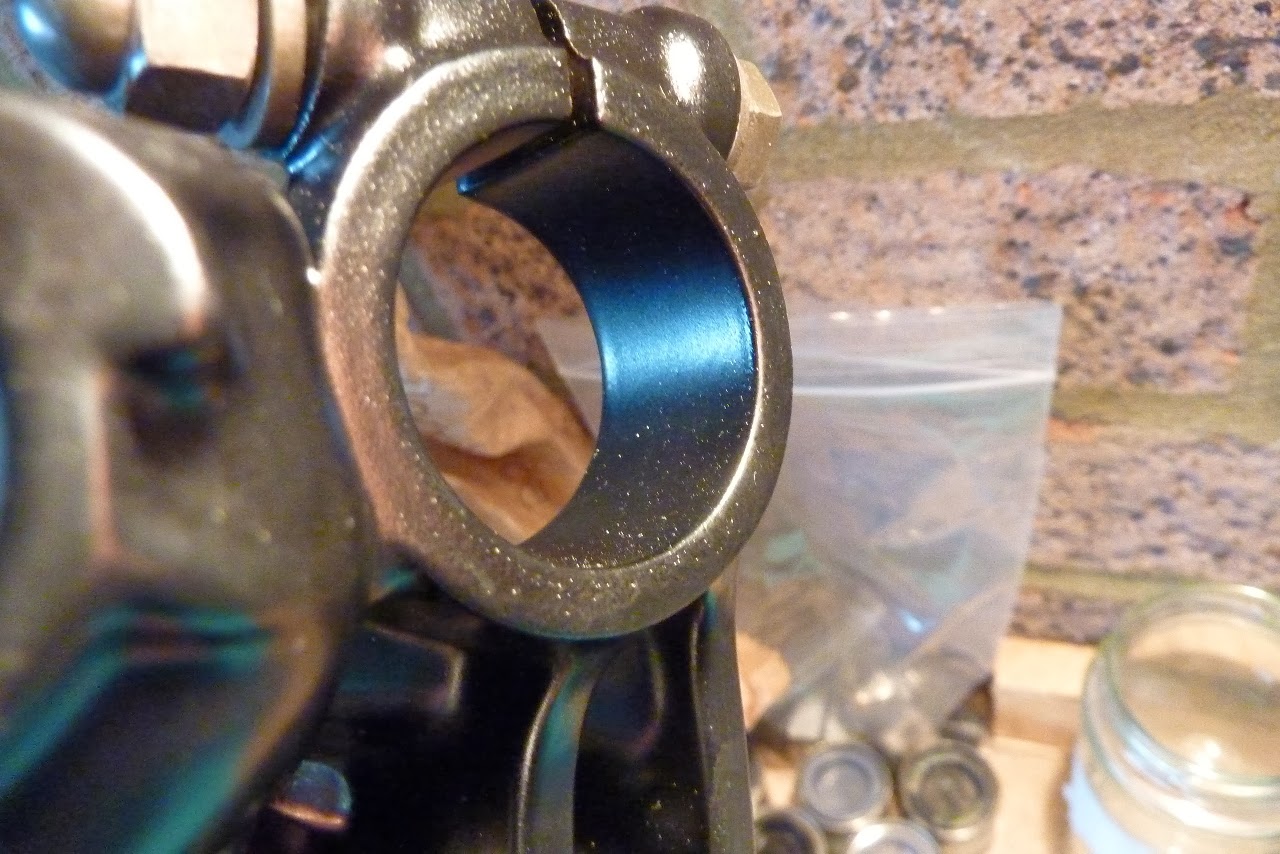

I tried putting the fork stanchion in:

Clearly it was not going to go in. It was scraping the paint:
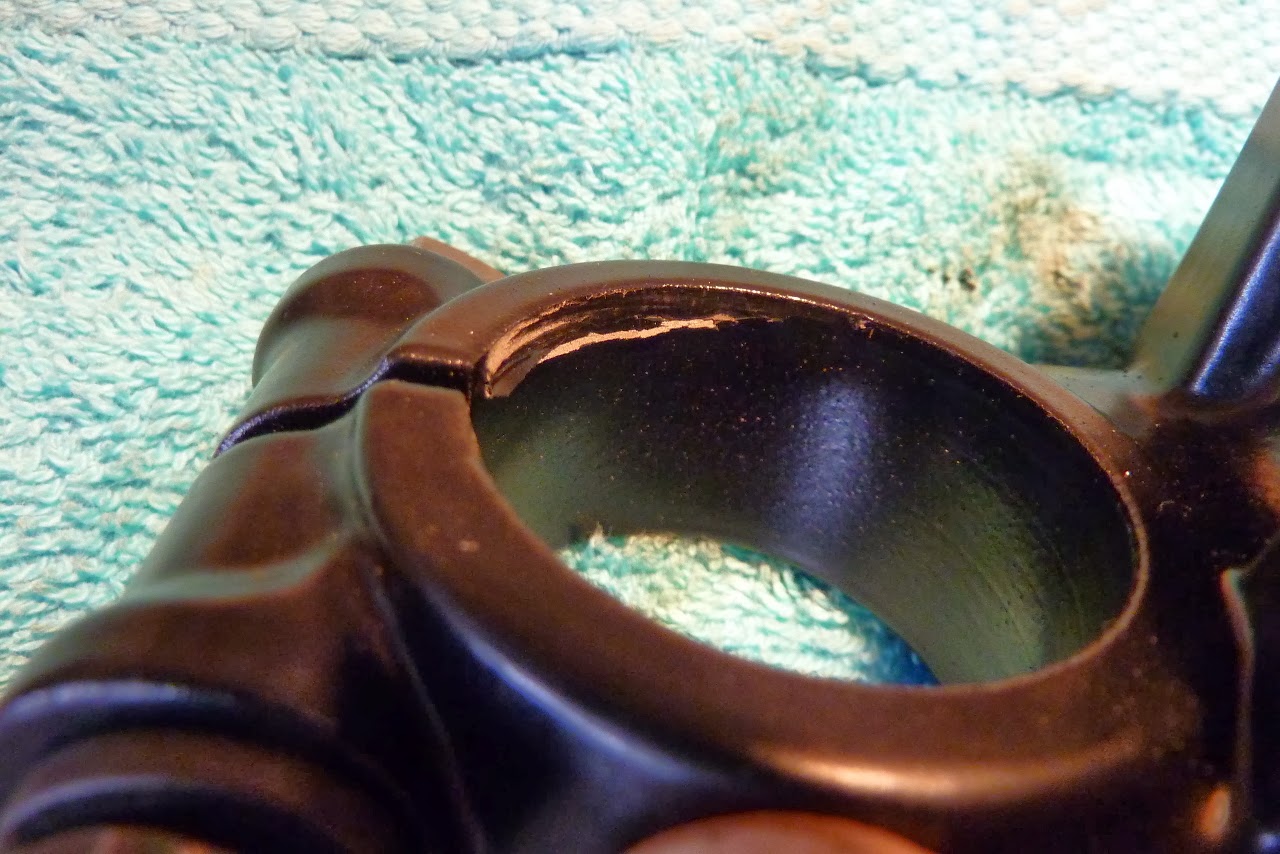
Is this the best way to get it off?

I tried putting the fork stanchion in:
Clearly it was not going to go in. It was scraping the paint:
Is this the best way to get it off?
De-painting The Inside of the Yokes
De-painting The Inside of the Yokes
OK let's get on with it. Here goes:


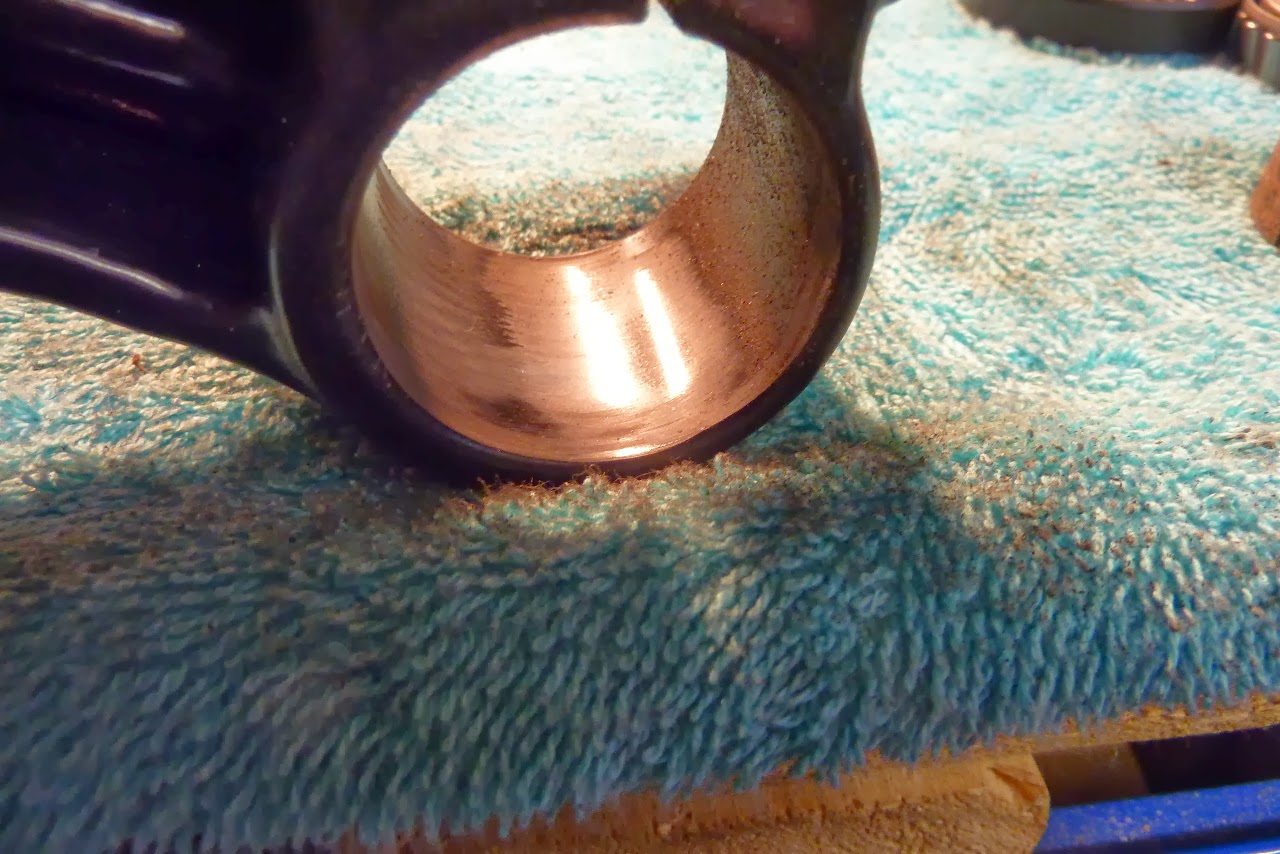
Did a little on my thumb too. Just to see how much it hurt.
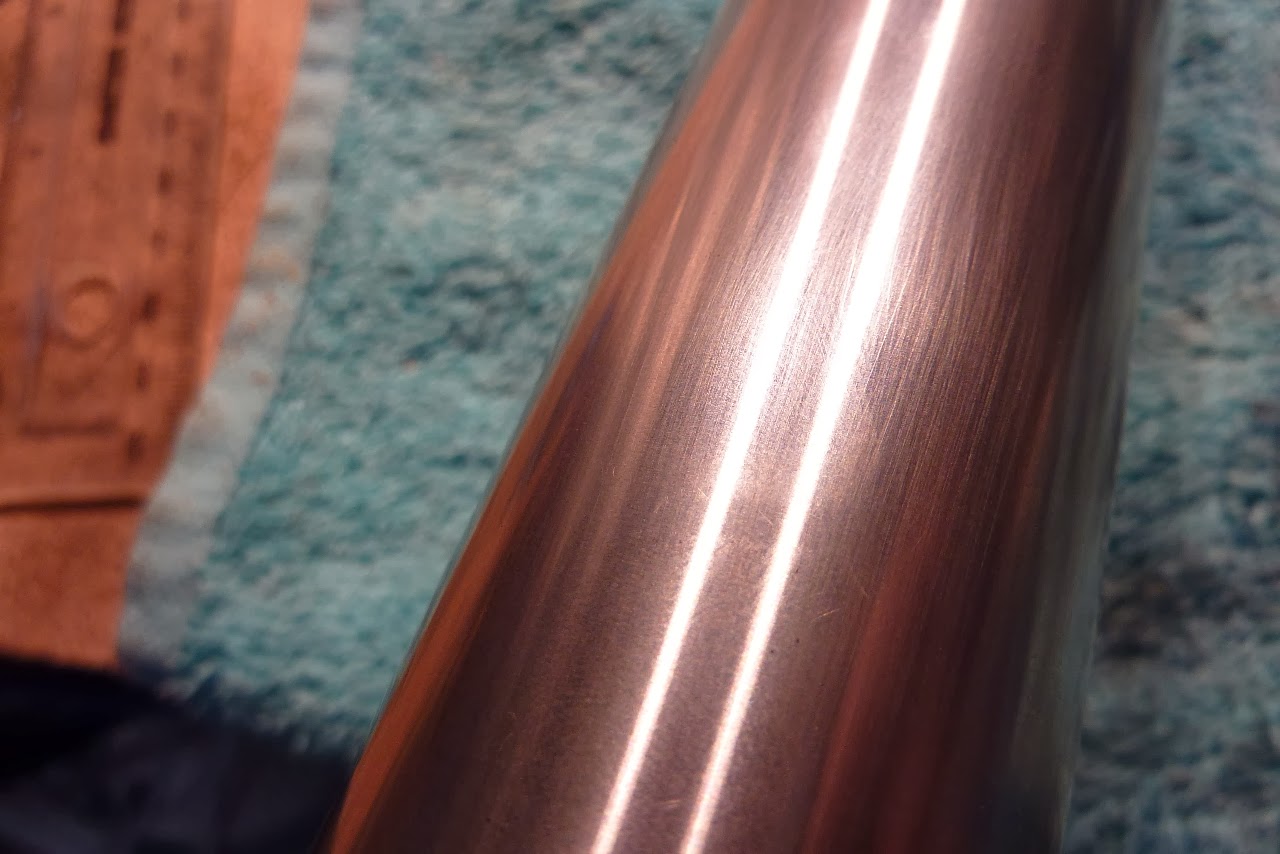
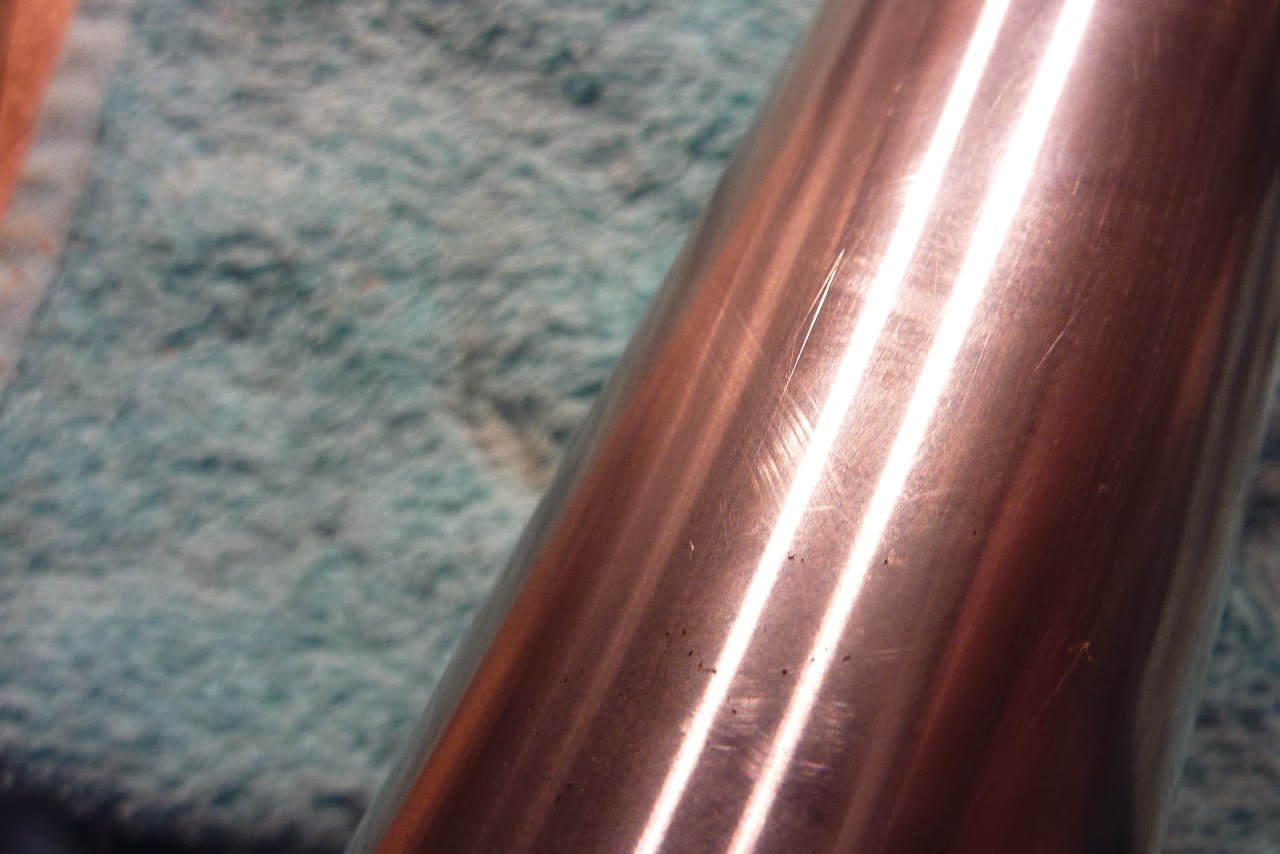
They go in quite nicely now:

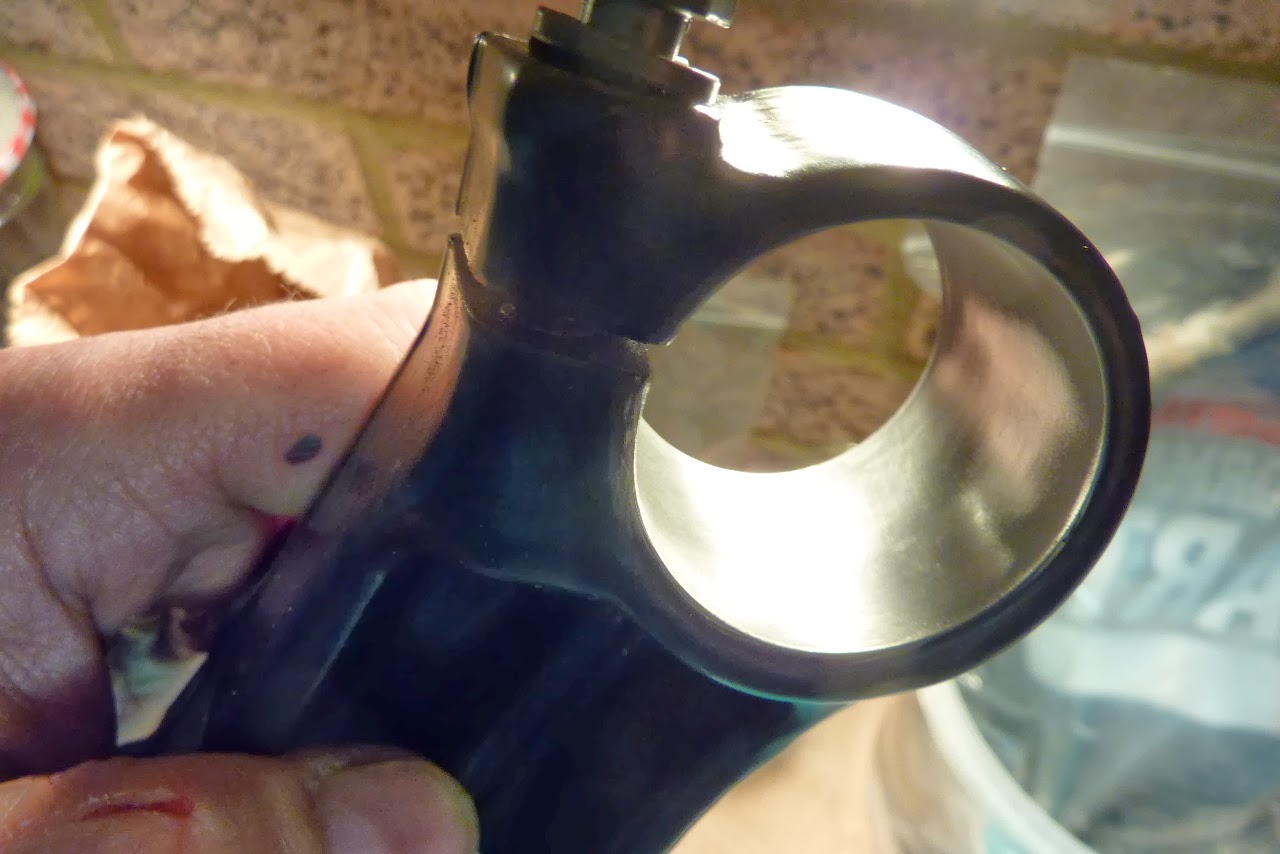
Buffed off a little of the exterior powder coat as well !! GGrrrrr !! But you won't notice it under the chrome badge holder that sits on the top of it.
And I didn't clean out the grit when a did a test run pushing in the stanchions. Very minor scratching is the result:
Next time!
Greetings
De-painting The Inside of the Yokes
OK let's get on with it. Here goes:
Did a little on my thumb too. Just to see how much it hurt.
They go in quite nicely now:
Buffed off a little of the exterior powder coat as well !! GGrrrrr !! But you won't notice it under the chrome badge holder that sits on the top of it.
And I didn't clean out the grit when a did a test run pushing in the stanchions. Very minor scratching is the result:
Next time!
Greetings
Last edited:
")
Day 562 - Steering Stem Bearing Instal
Day 562 - Steering Stem Bearing Instal
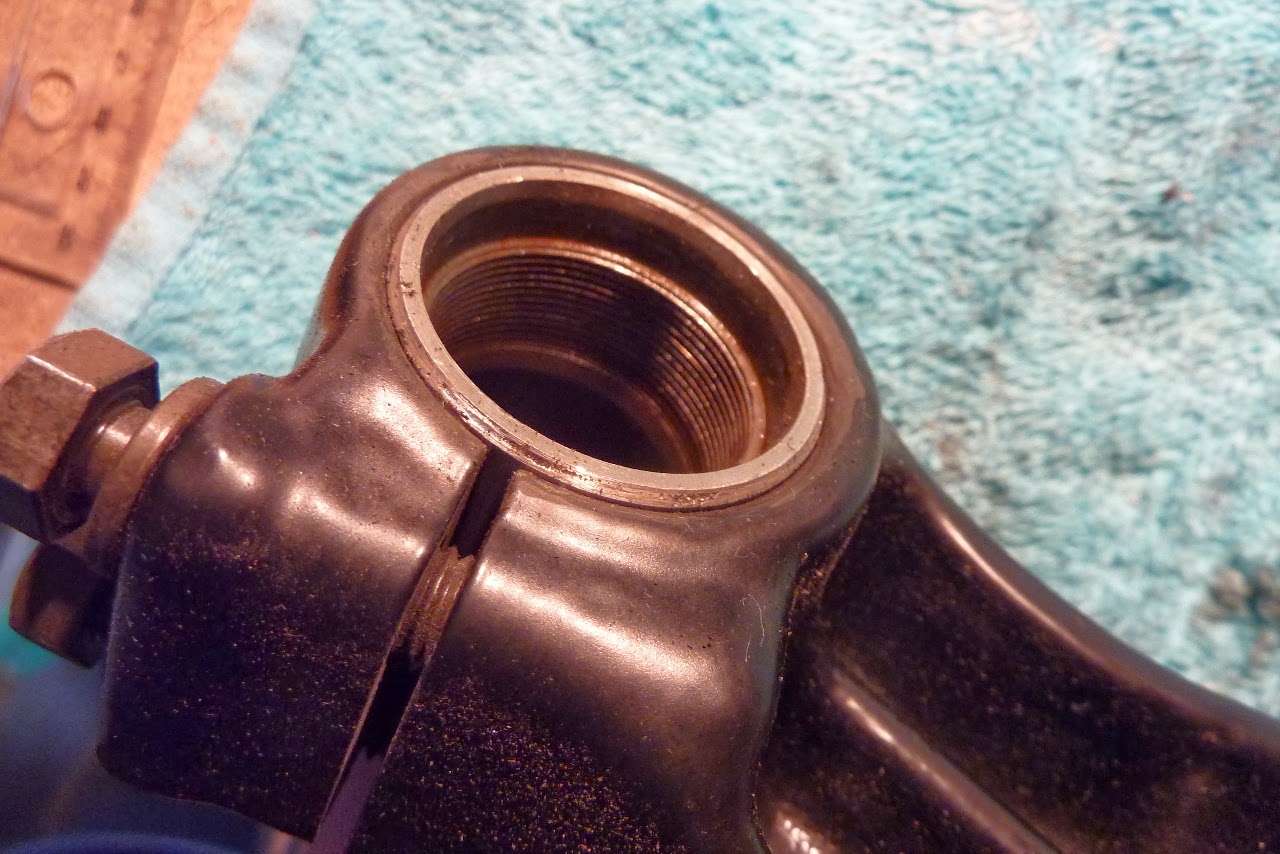
I found a neat little tool to help seat this bearing on the stem. Do the usual tricks of putting the stem in the freezer, heating up the bearing in the oven and oiling the stem. Then use the fork stanchion turned upside down as the bearing driver. It's dimensions are just right to fit inside the bearing to put pressure on the correct part. I used a rubber mallet to drive it home quite easily. Be careful not to damage the delicate threads at that end of the stanchion as you put it over the stem.


It's a perfect fit


Home and dry

Day 562 - Steering Stem Bearing Instal
I found a neat little tool to help seat this bearing on the stem. Do the usual tricks of putting the stem in the freezer, heating up the bearing in the oven and oiling the stem. Then use the fork stanchion turned upside down as the bearing driver. It's dimensions are just right to fit inside the bearing to put pressure on the correct part. I used a rubber mallet to drive it home quite easily. Be careful not to damage the delicate threads at that end of the stanchion as you put it over the stem.
It's a perfect fit
Home and dry
F
Flyboy
Guest
Nice, following with interest. :clap:
You did remember the washer under the steering head bearing, right?
You did remember the washer under the steering head bearing, right?